In this blog, I’ll be configuring an NFS share on a Pure Storage FlashBlade which will be utilised by Veeam Backup & Replication v10 as an NFS backup repository.
Veeam Backup & Replication has supported backups directly from NFS (Direct NFS Access) and restored directly to NFS (Data Restore in Direct NFS Access Mode) natively for a while now, but backing up to an NFS share has always been a bit of a challenge. Limitations around mounting an NFS share on Windows meant organisations were required to deploy workarounds that required Linux servers and NFS mount points, which often ended up in the ‘too hard bucket’ for administrators who preferred the ease of Windows and SMB.
The great news is Veeam Backup & Replication v10 can now natively leverage an NFS share directly without any Linux machines acting as a middleman. In typical Veeam fashion, it’s a simple wizard-driven process to setup the NFS share, just like any other backup repository types supported by Veeam.
In this guide, we’ll be using a Pure Storage FlashBlade as the underlying storage for the NFS share. FlashBlades are great targets for Veeam for a few reasons: they provide high performance in a dense form-factor, they support multiple protocols such as NFS, SMB and Object Store in parallel, and scaling out is a simple case of adding another blade.
New features in Veeam v10 such as the Multi-VM Instant recovery or data APIs are increasing the storage IOPS demanded, which some legacy backup storage fail to deliver. As an all-flash storage platform, the FlashBlade is designed to handle the random I/O traffic that can be generated from large Multi-VM Instant Recovery sessions (aka restore bootstorms).
With the addition of ransomware-proofing backups with Pure Storage SafeMode, it’s pretty easy to see why these devices make great Veeam backup targets.
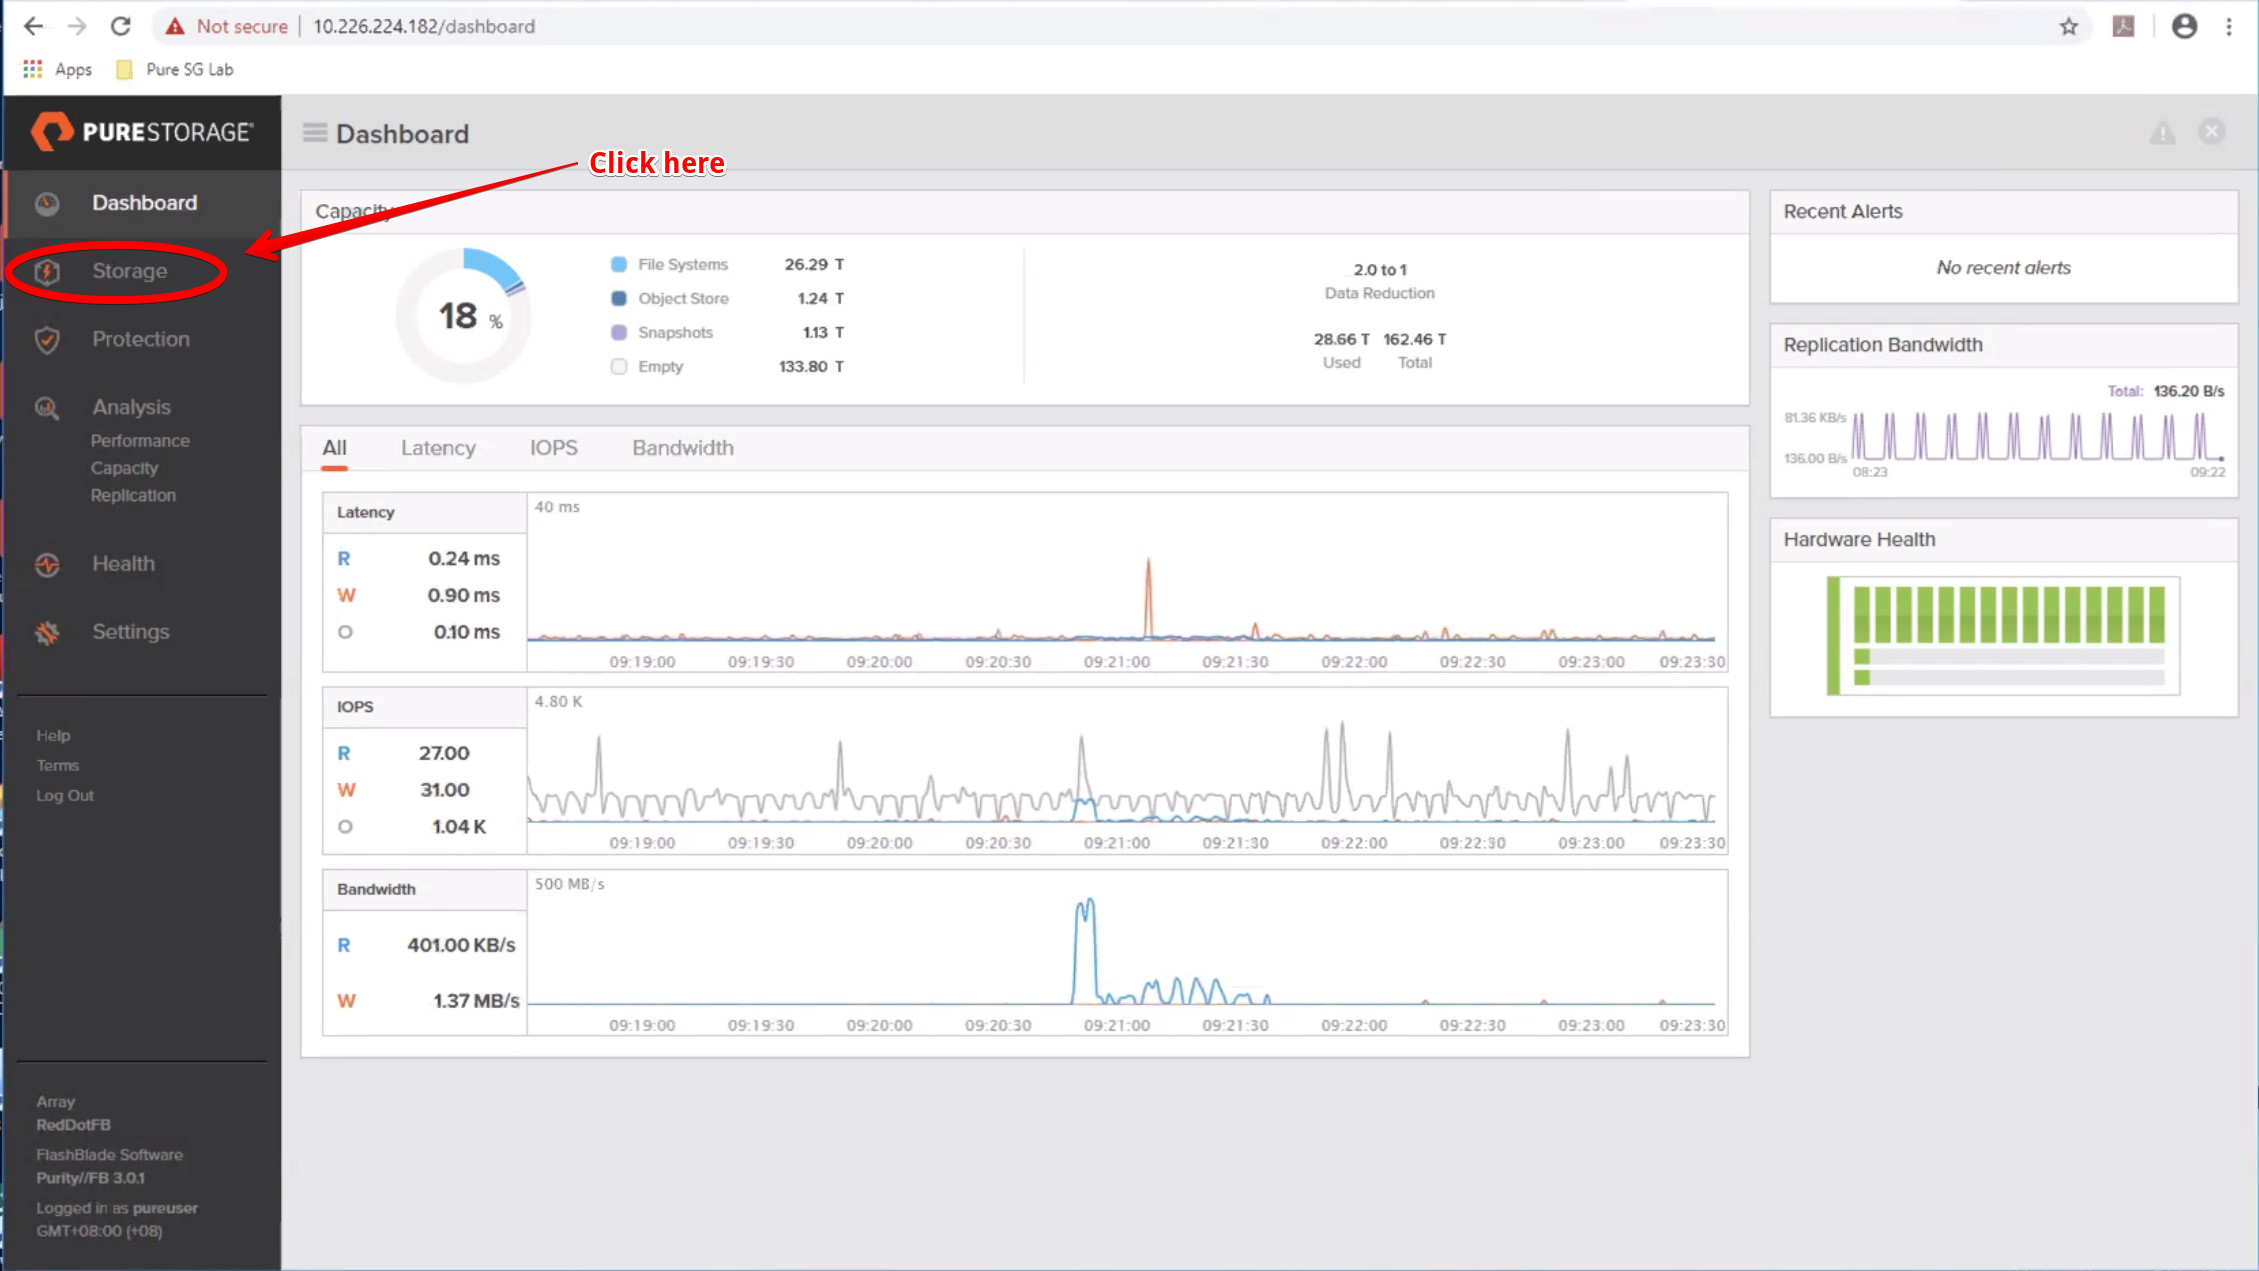
Let’s get started. After logging into our FlashBlade management interface, we are greeted with the typical Pure Storage interface. For those familiar with FlashArrays, you’ll notice the interface is identical.
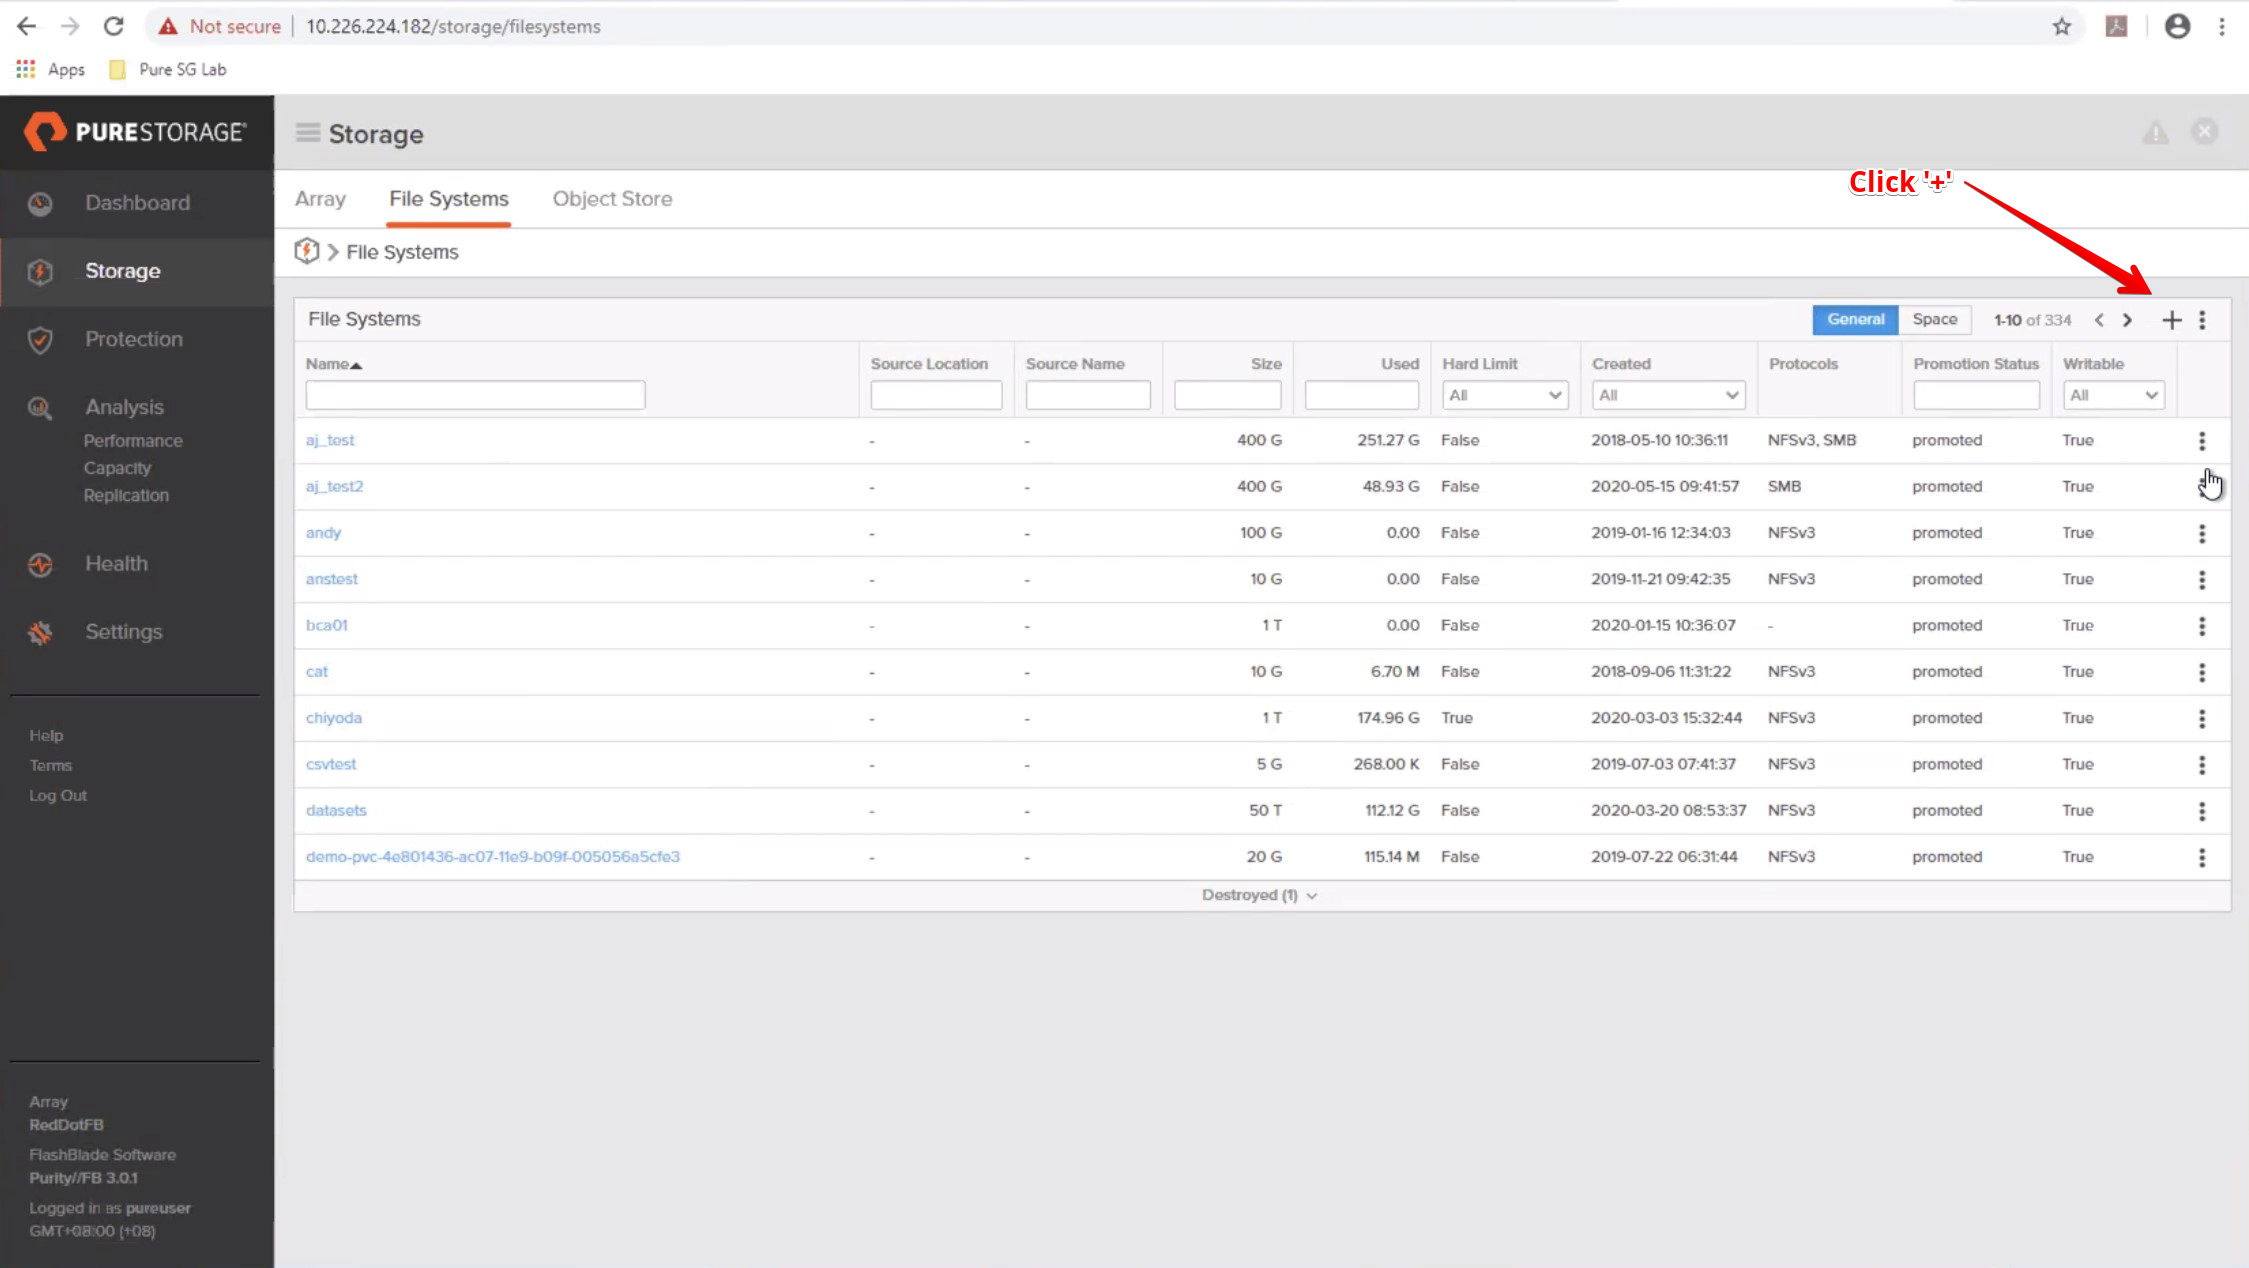
First, click on the ‘Storage’ option in the left-hand navigation pane.
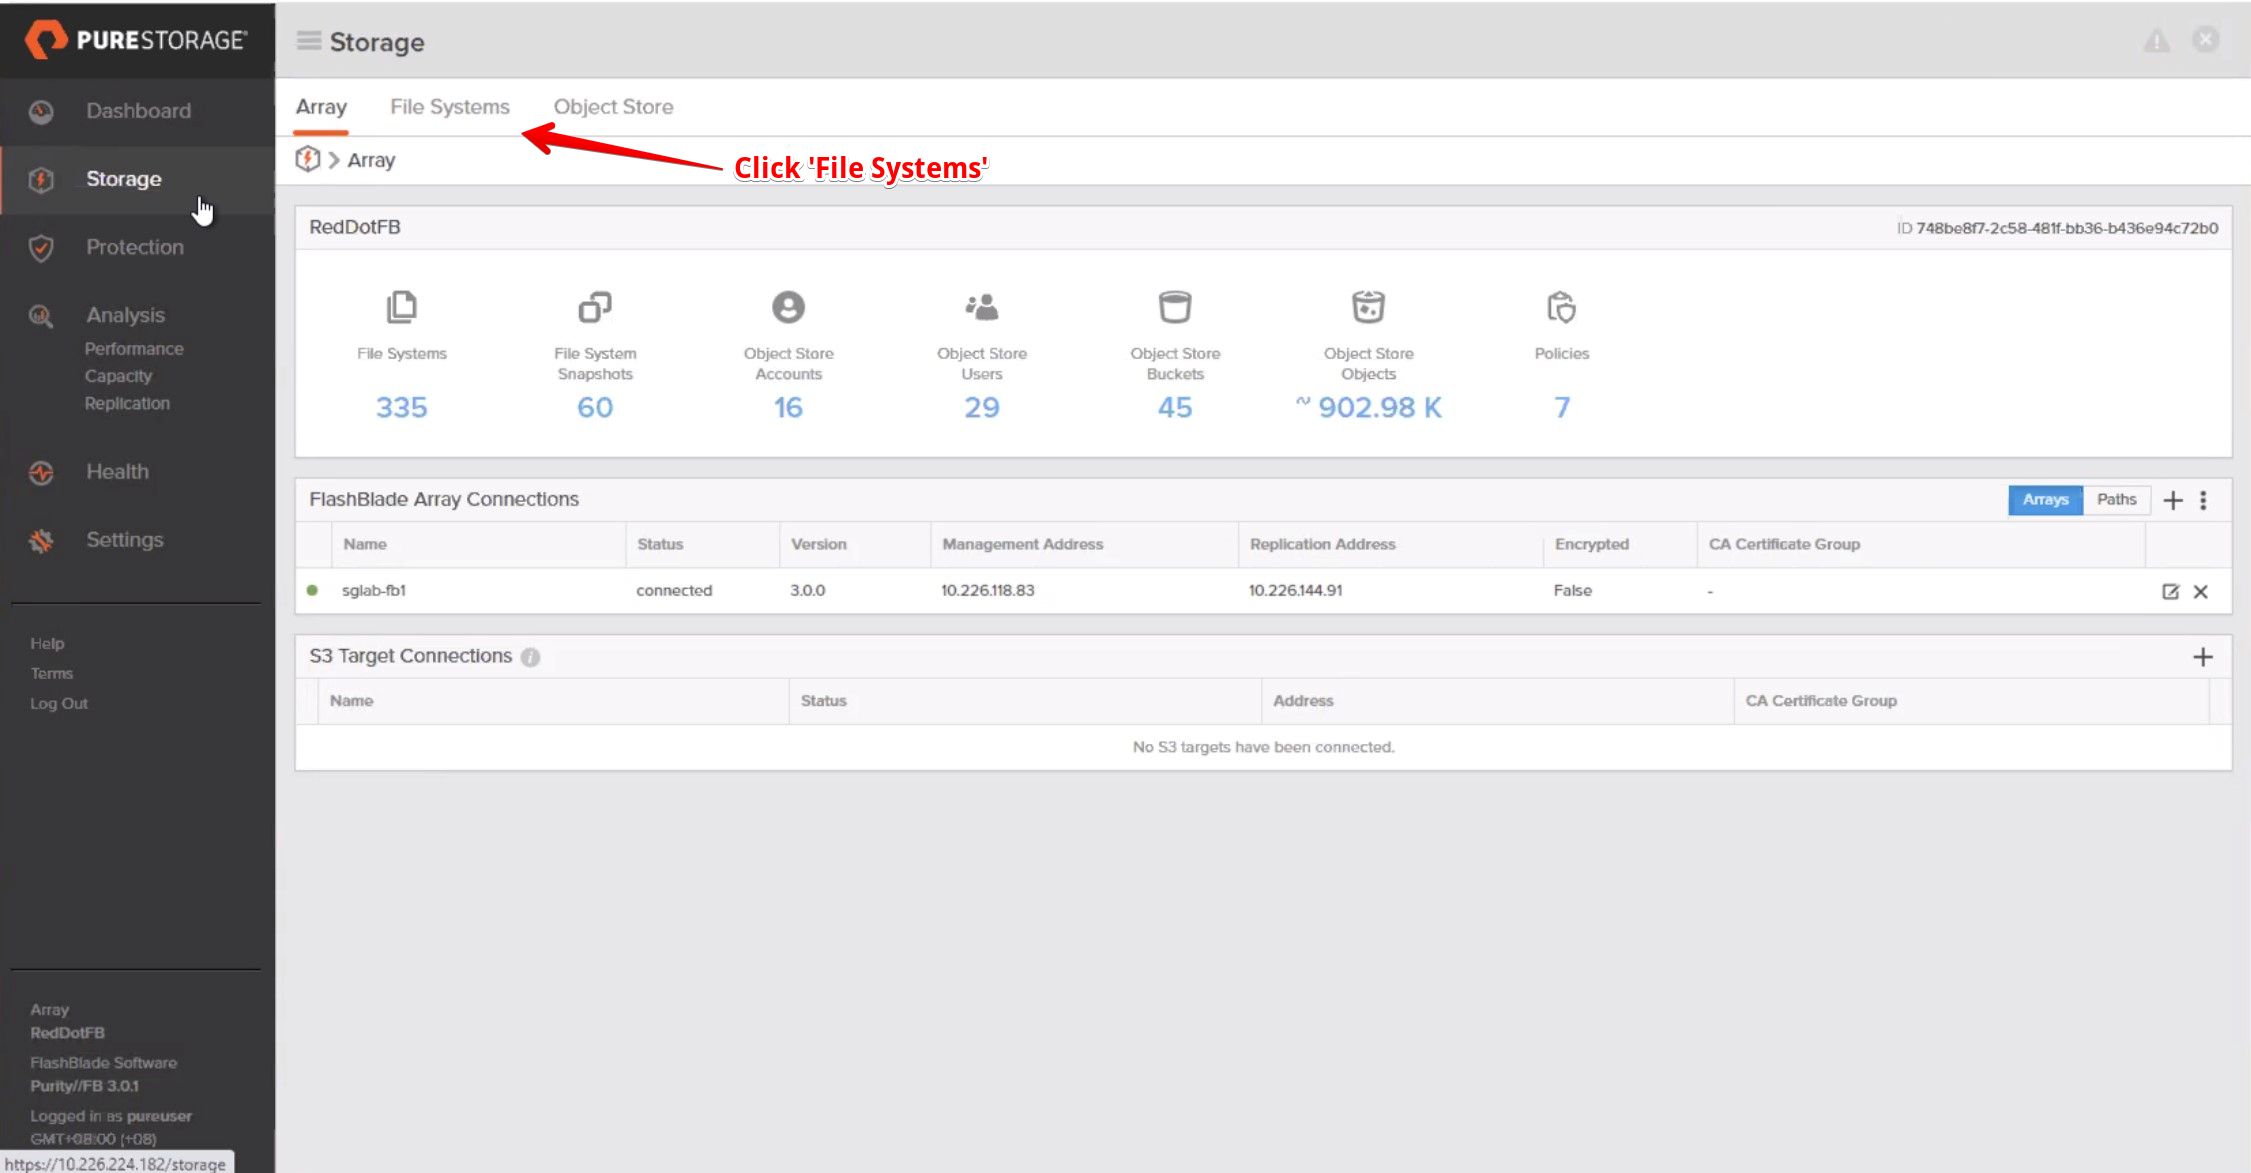
Click on the ‘File Systems’ tab.
We then click the ‘+’ symbol to Create File Systems, which will open a new dialogue box.
Next, we provide the NFS share name, the provisioned size and enable the NFSv3 option.
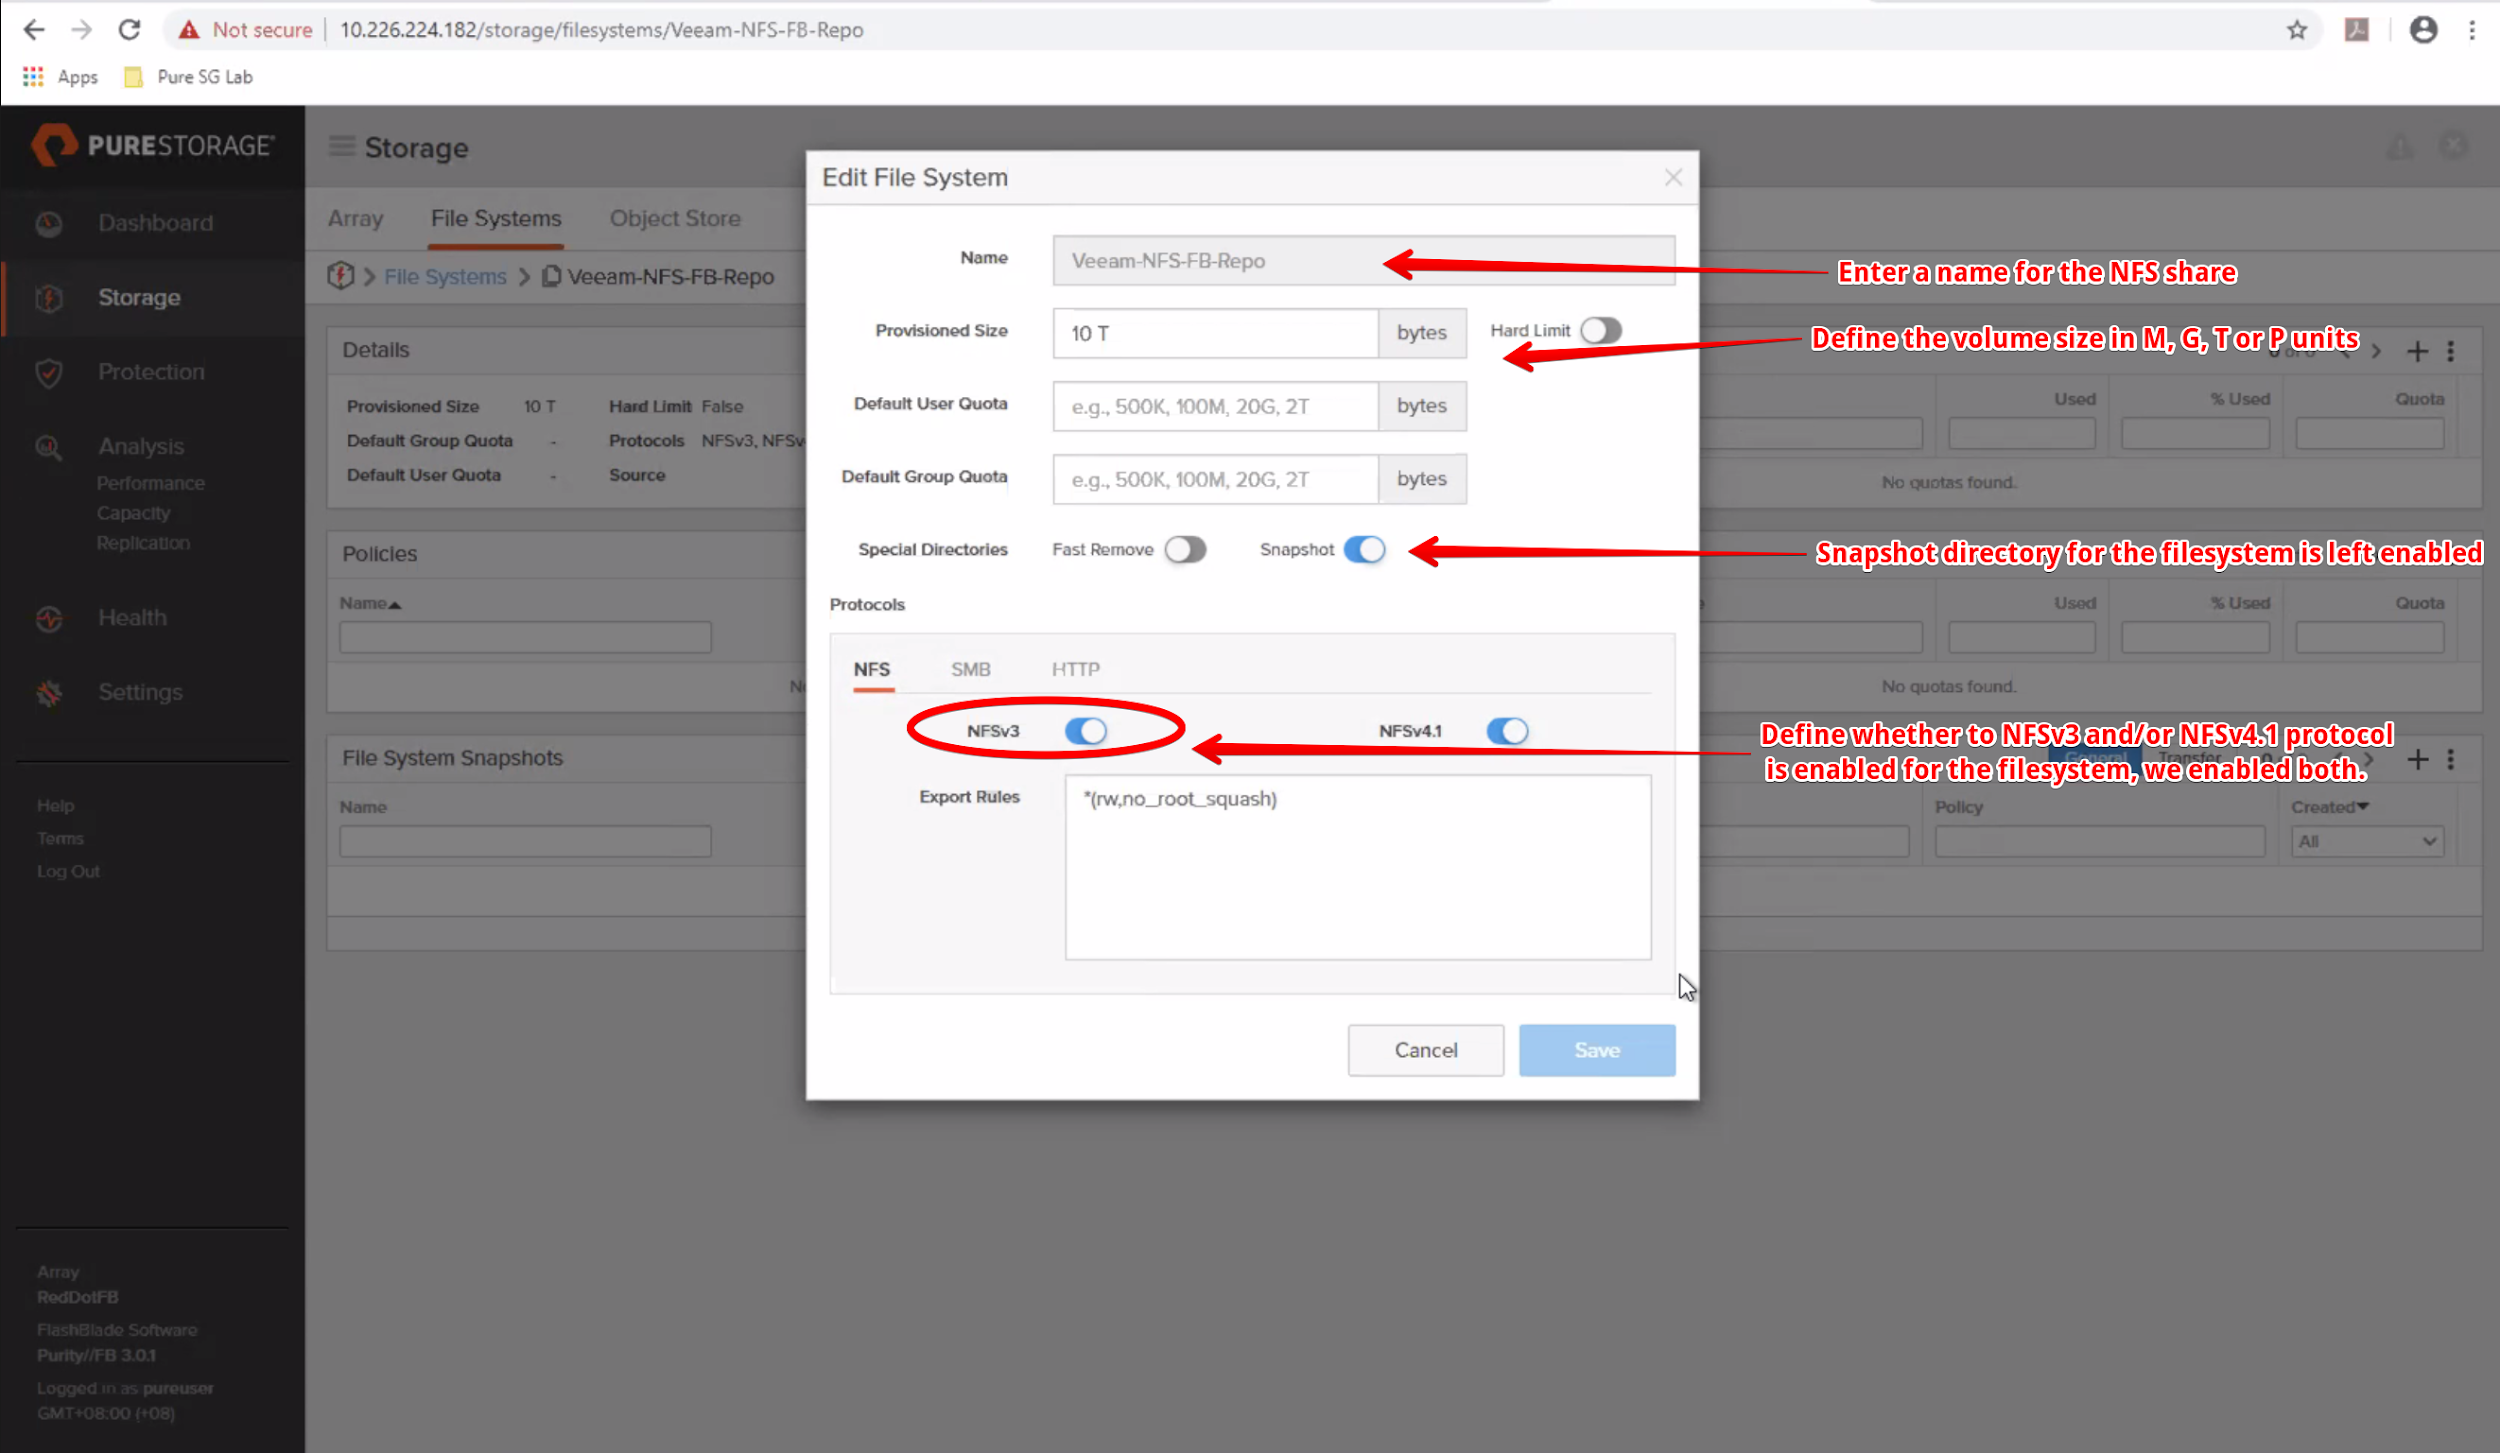
While v4.1 is supported by Veeam, in our experience, v3 was required for a successful mount of the NFS share to work.
Note: Veeam Backup & Replication will use the highest NFS protocol version supported by the gateway and the repository. If you change the NFS protocol version at a later date (for example, if you updated the NFS share), you’ll need to reconfigure the Veeam backup repository (which we’ll be setting up shortly) by clicking through the Edit Backup Repository wizard in Veeam to update the information in Veeam Backup & Replication.
Currently, Veeam Backup & Replication v10 supports filers presenting capacity via NFS share using protocol version v3.0 and v4.1 only.
The FlashBlade ‘Hard Limit’ setting allows us to define whether the capacity for a filesystem is a hard limit. CAUTION: This setting will cause the filesystem to go Read-Only, if the capacity has already exceeded the logical size of the filesystem.
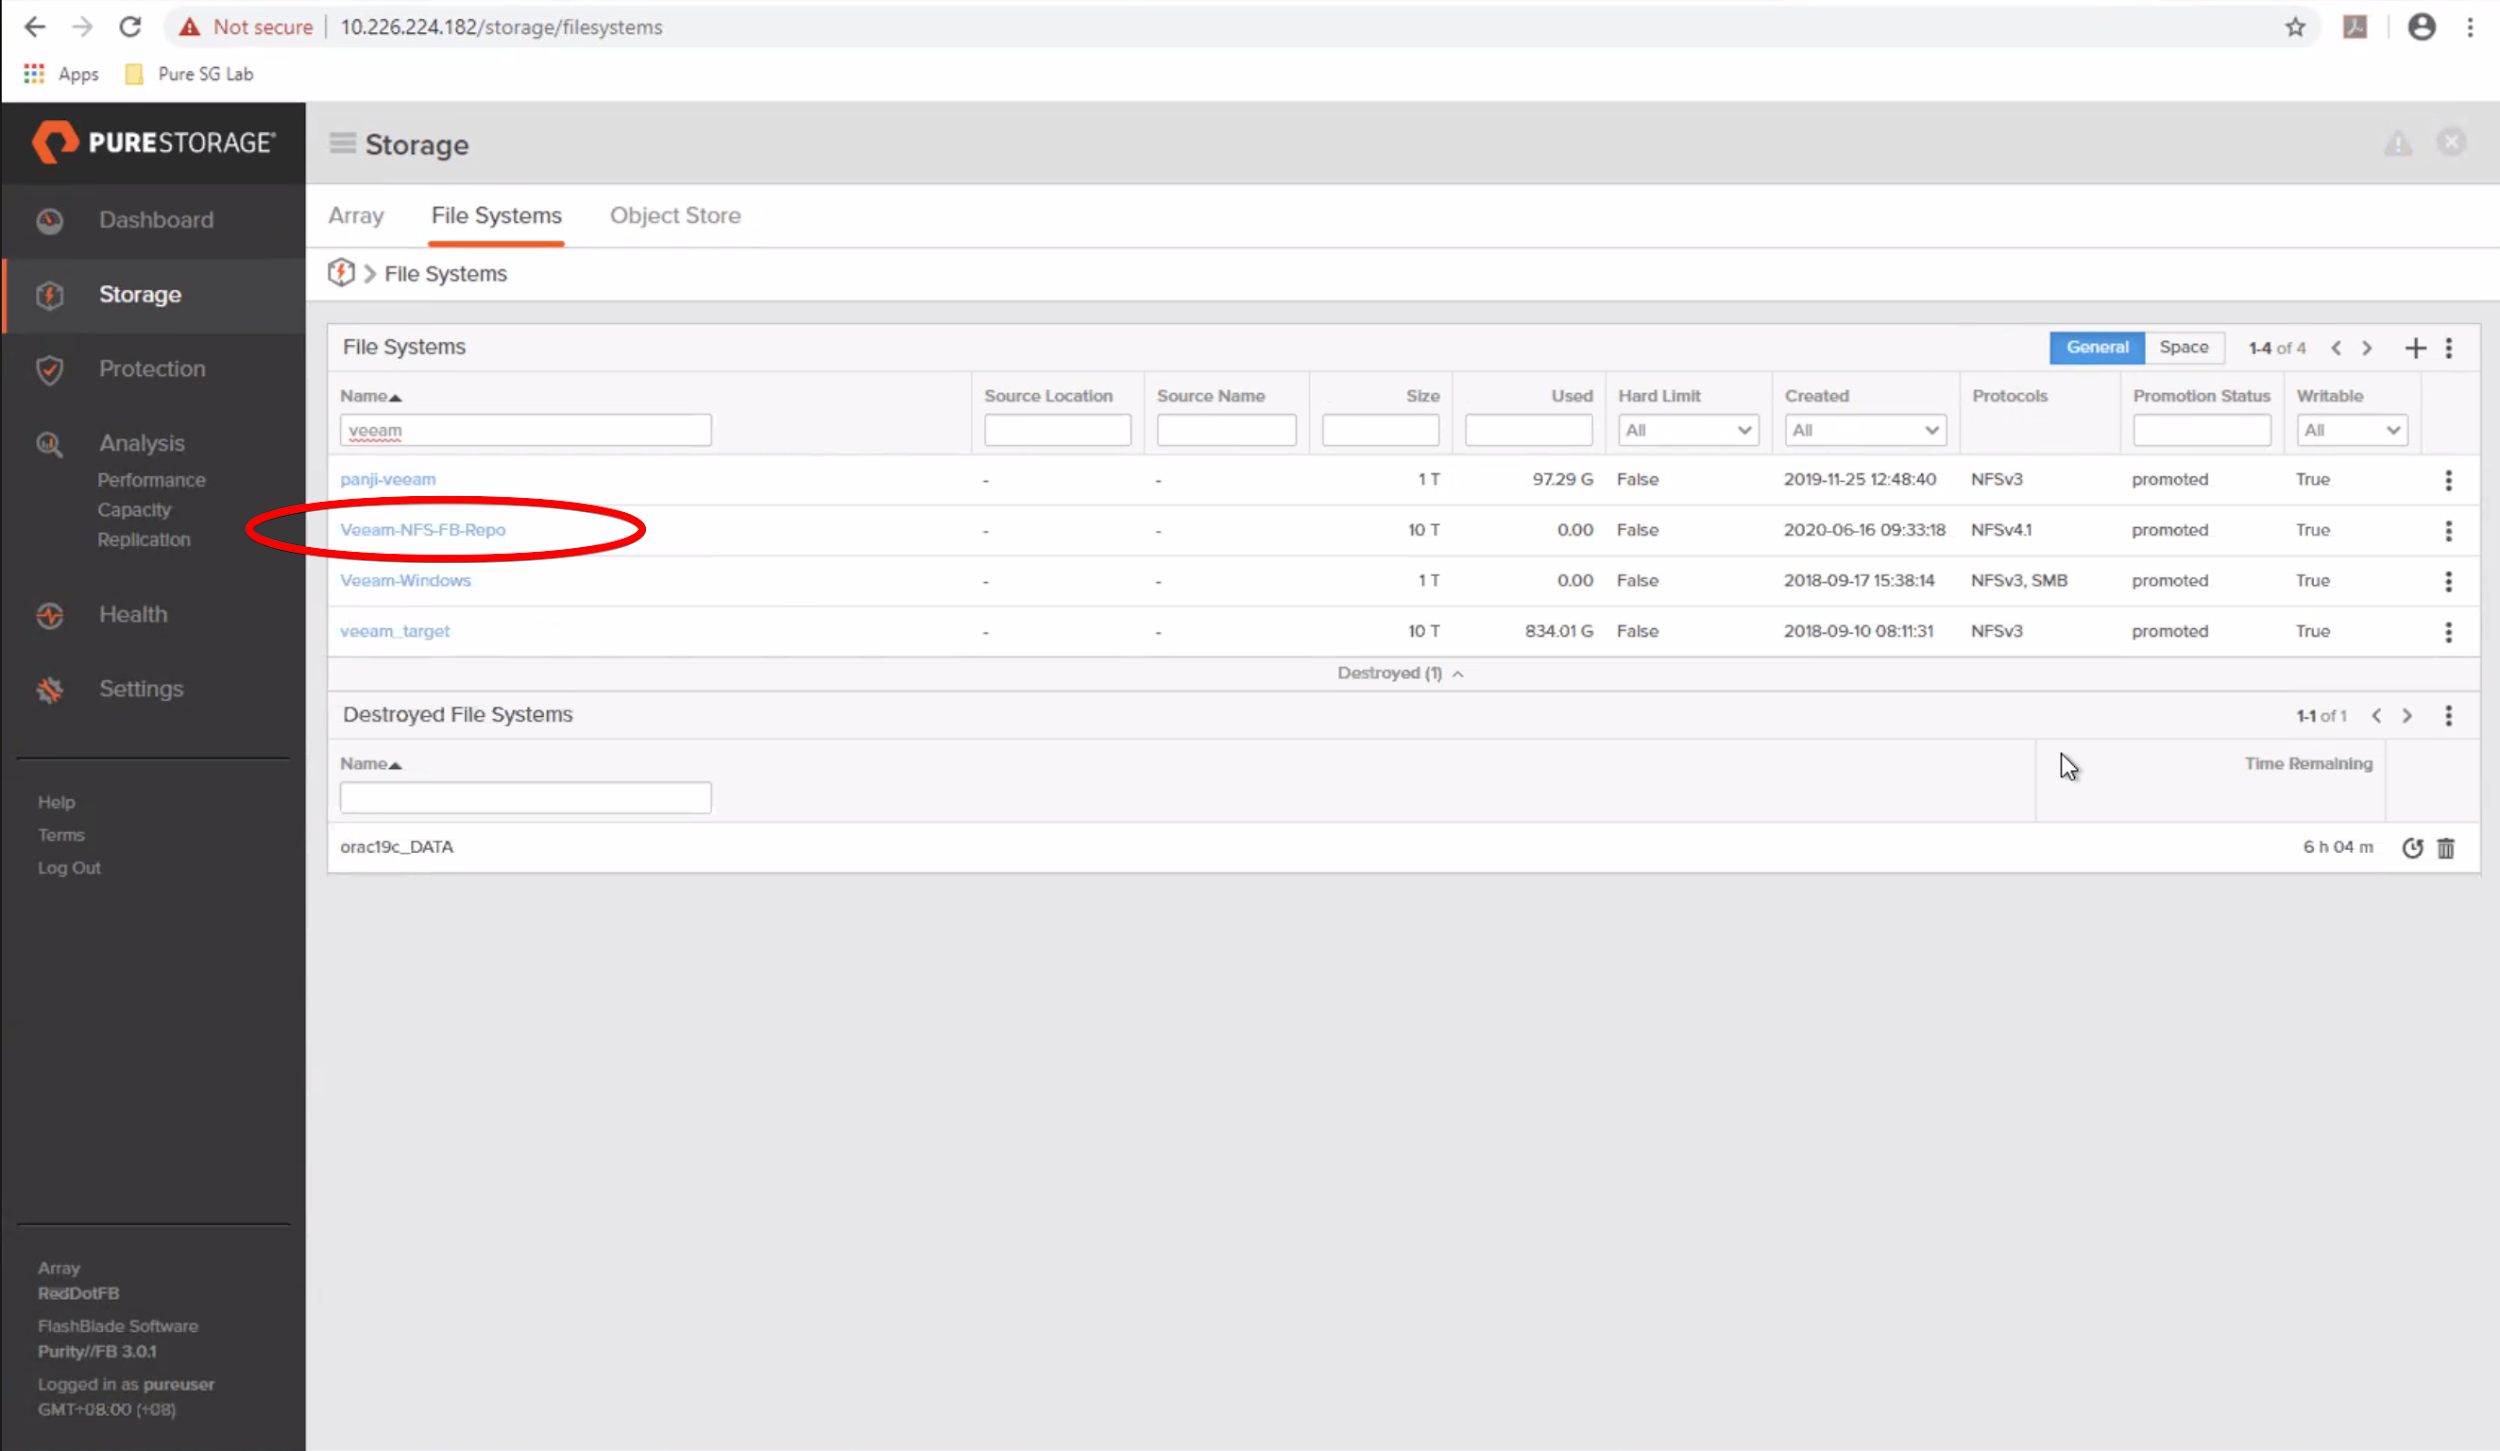
As below, the NFS share has successfully been created.
At this point, we’ve finished configuring the FlashBlade NFS Share. We can now move onto Veeam Backup & Replication configuration.
A Veeam backup repository is simply a storage location where Veeam will keep backup files, Virtual Machine (VM) copies, and metadata for replicated VMs. Below, we’ll discuss how to add our FlashBlade NFS share as a Veeam backup repository.
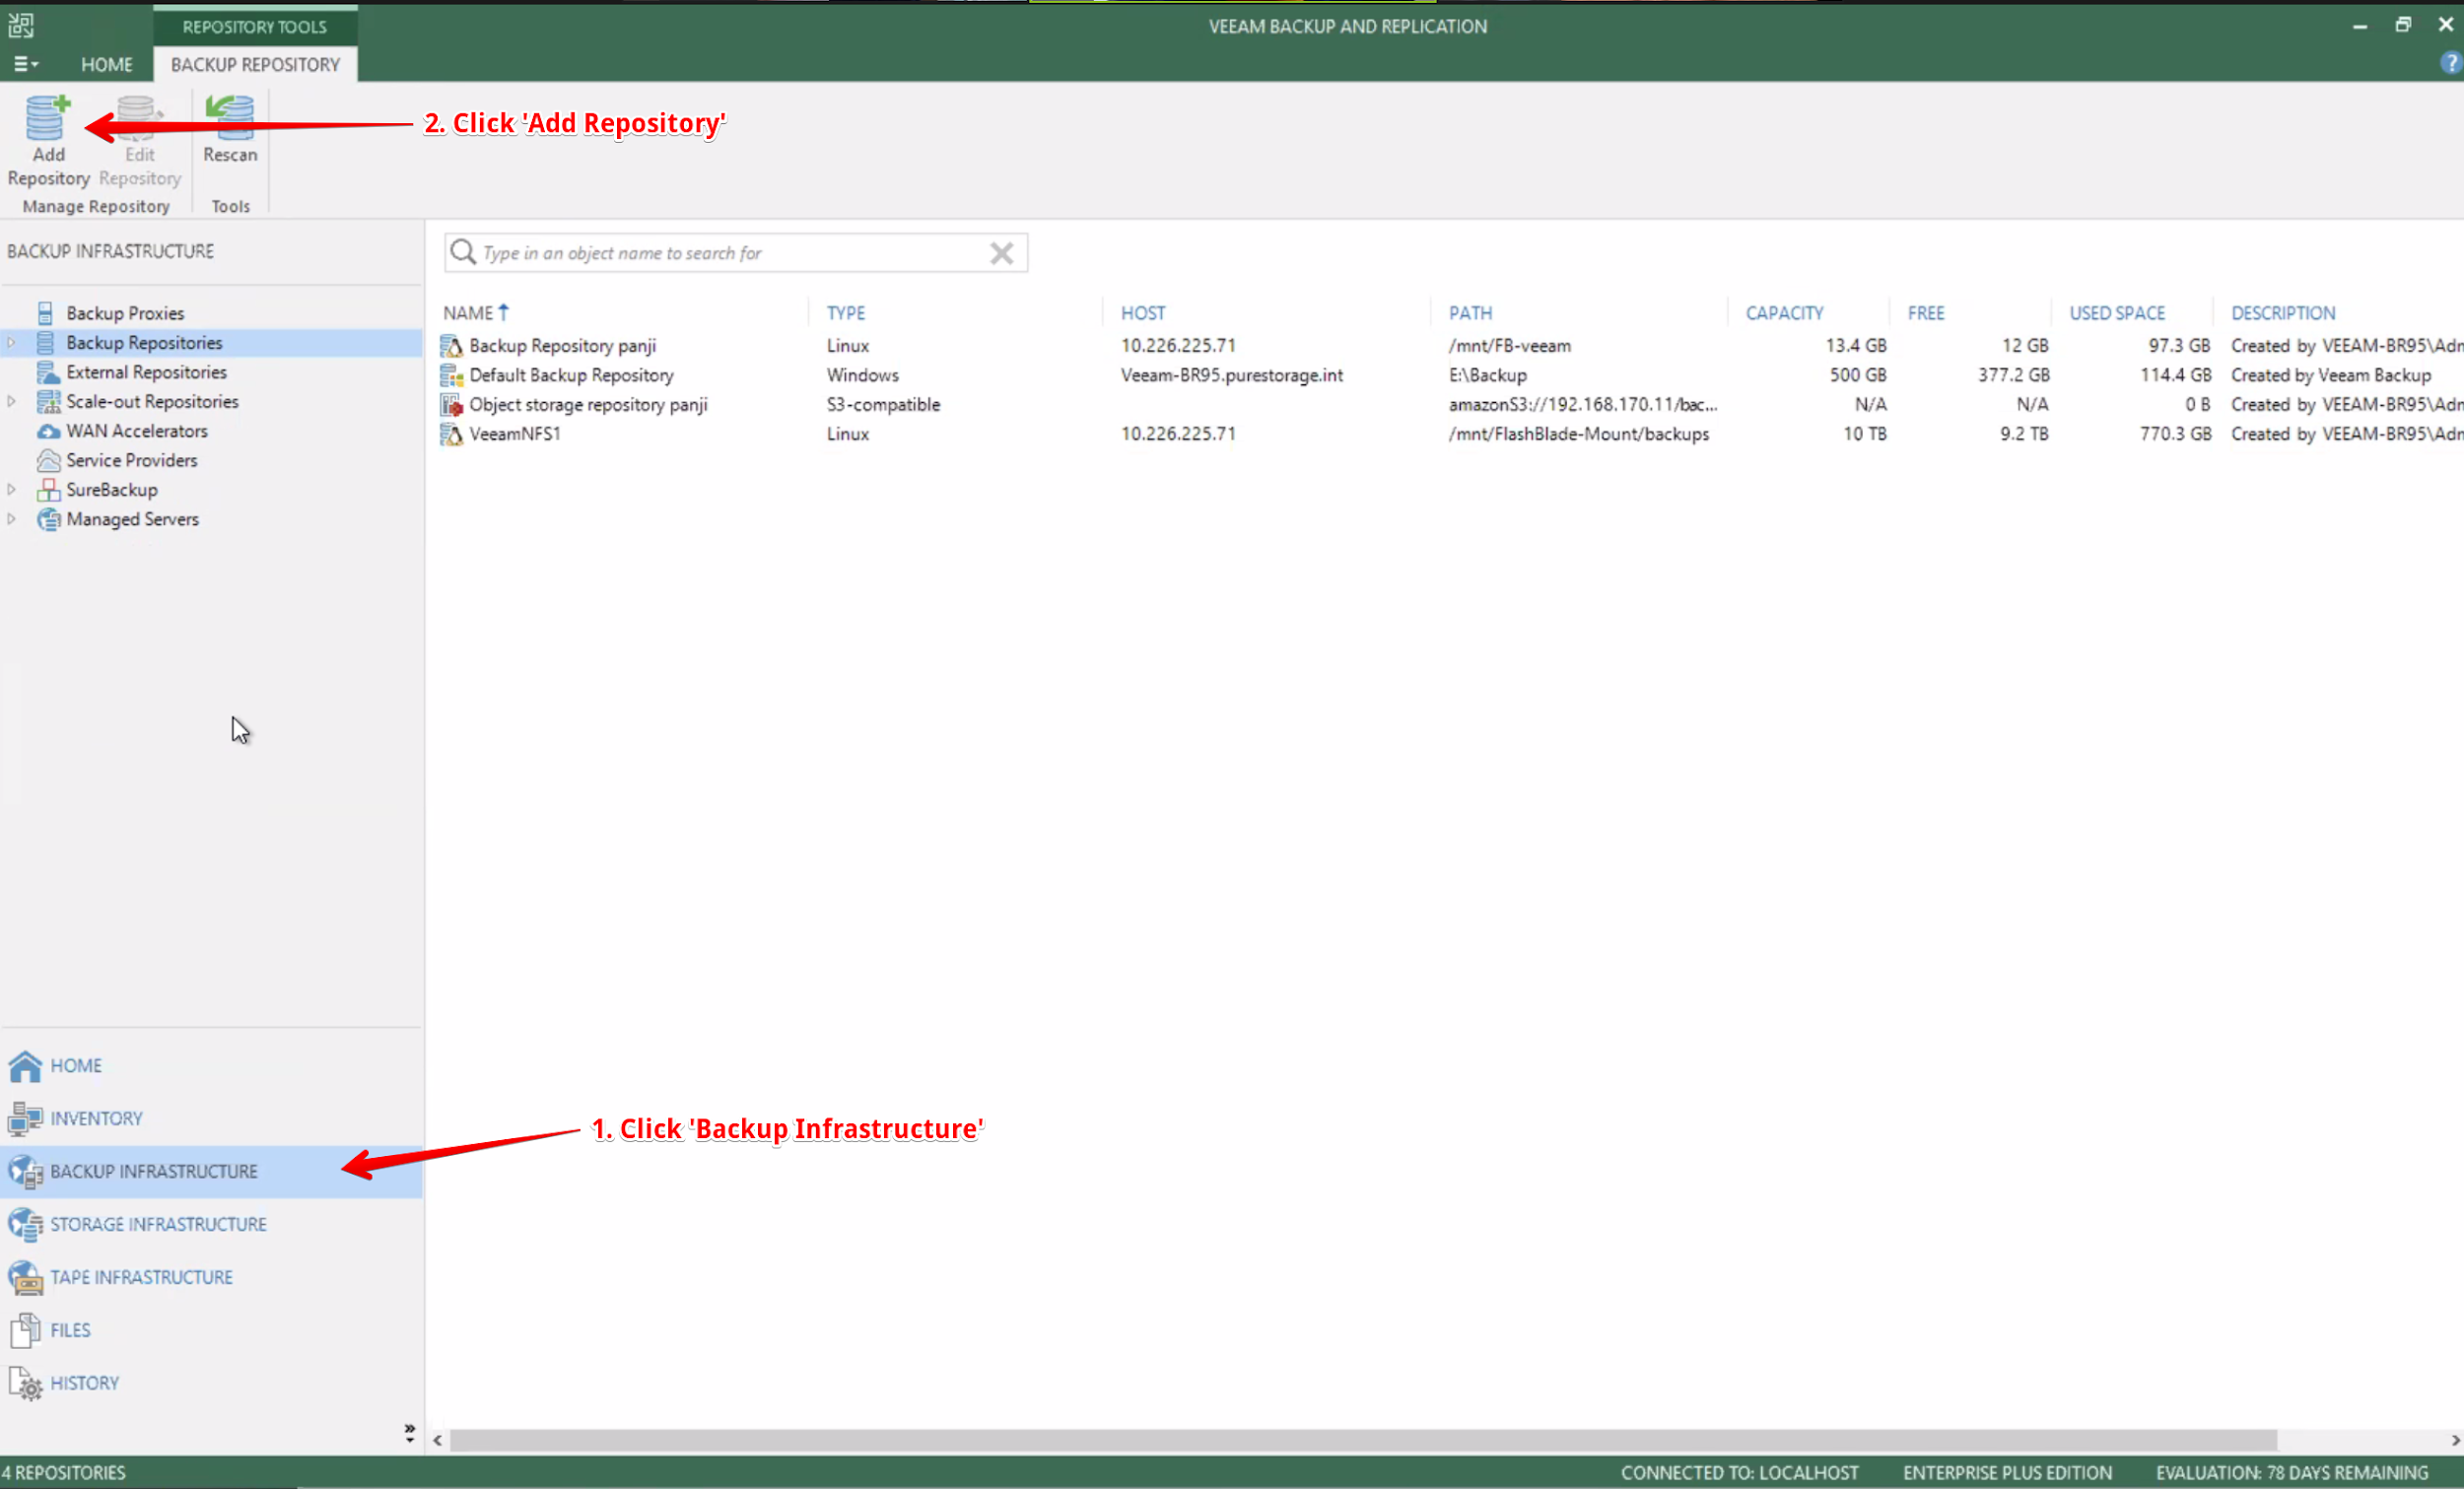
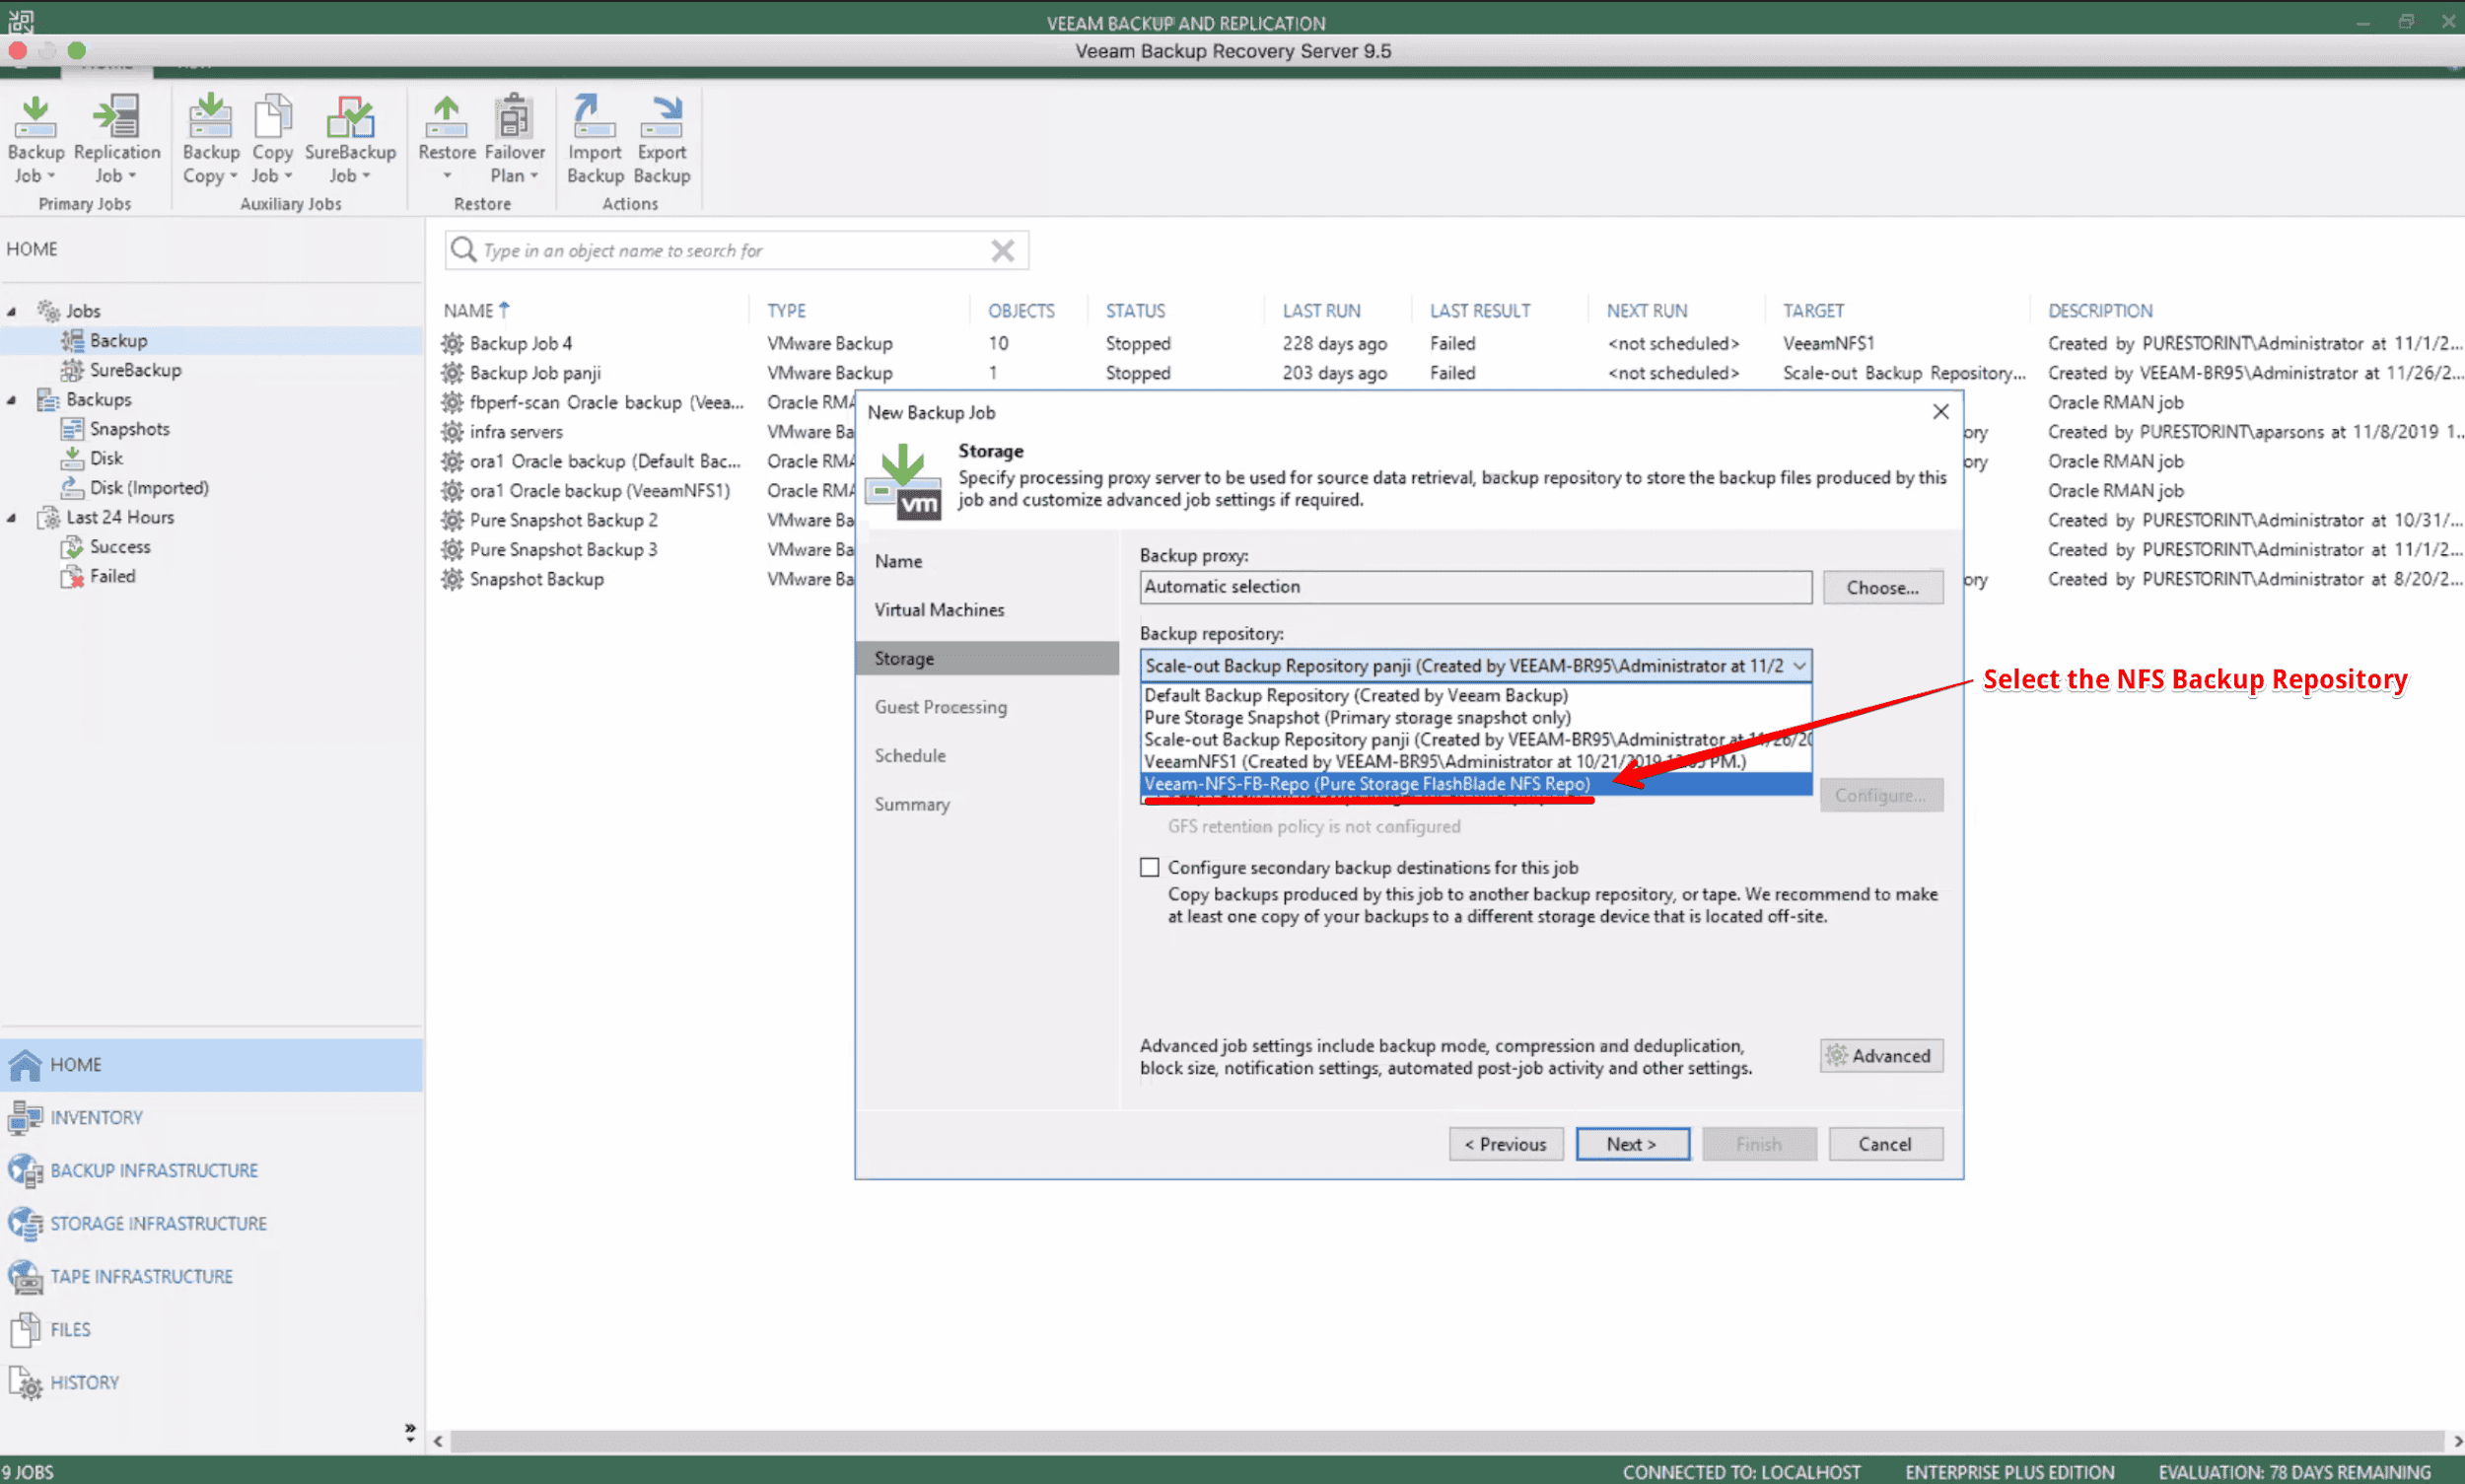
After opening the Veeam console, to add the new NFS backup repository, click Backup Infrastructure > backup repositories. Click ‘Add Repository’ in the top right. Note that a new dialogue box appears.
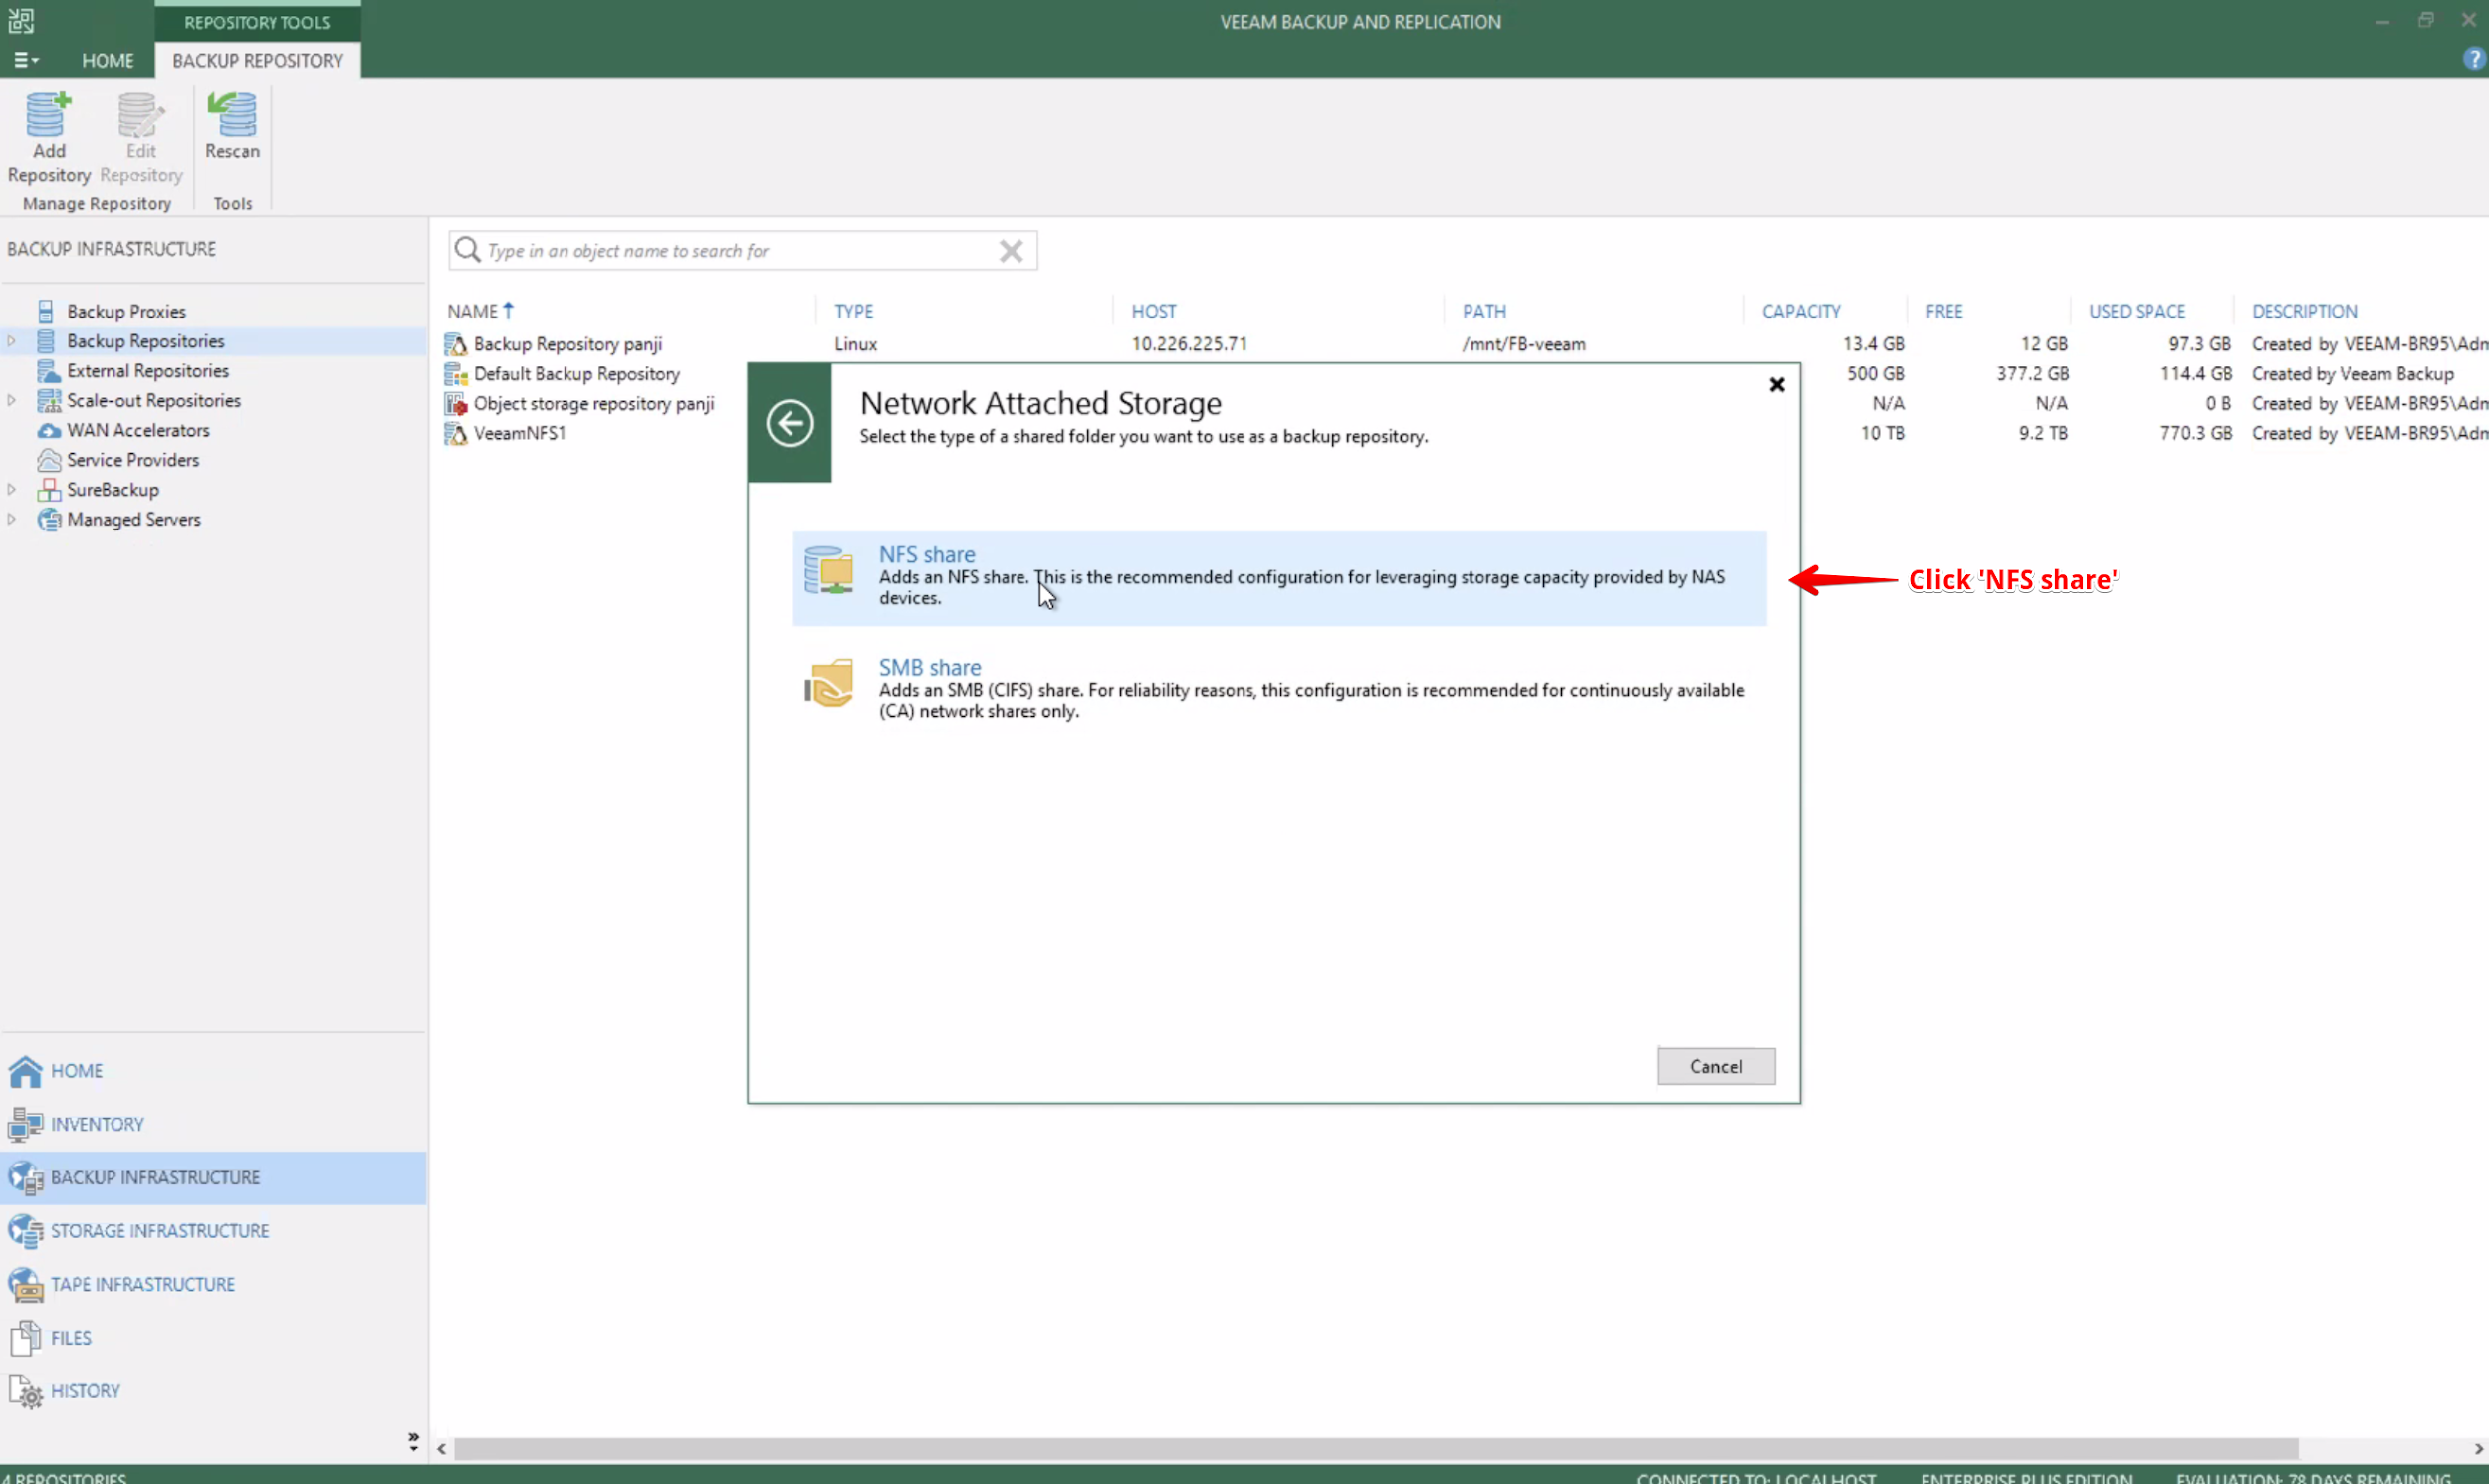
Click ‘Network attached storage’.

Click ‘NFS share’.
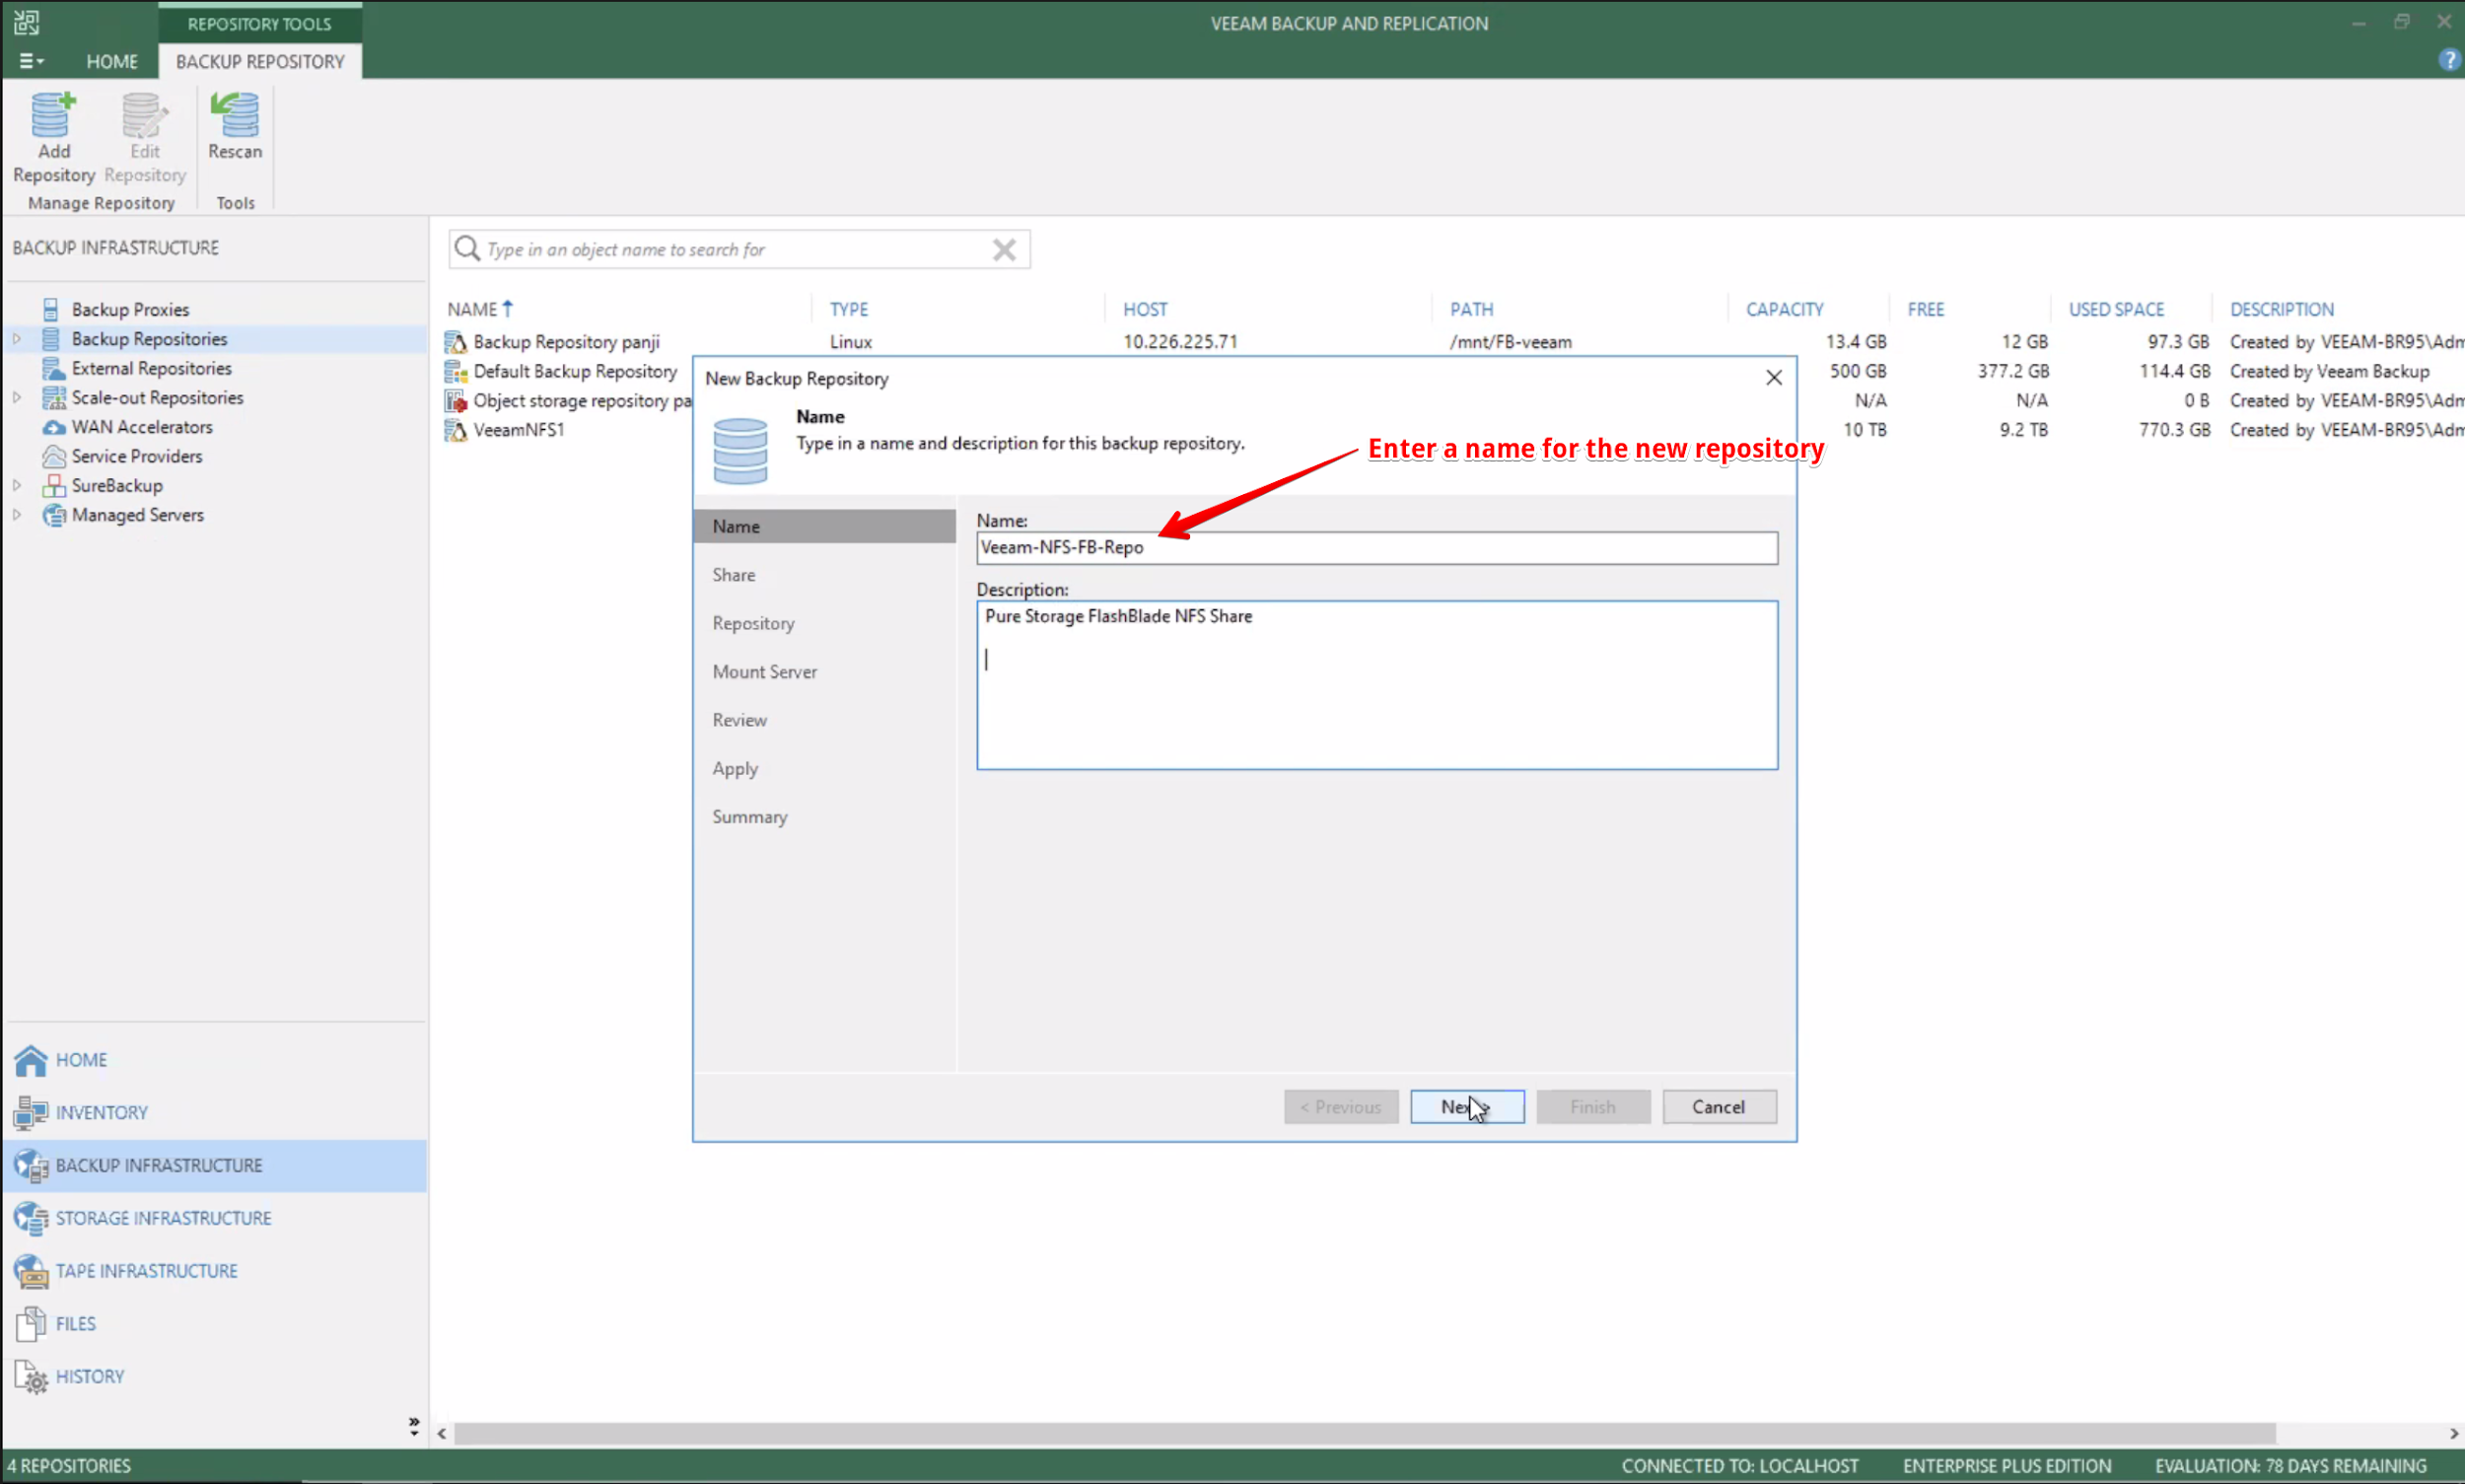
Here, we need to enter a name for the new repository; It’s recommended to use a naming convention. We have the option to enter a description as well.
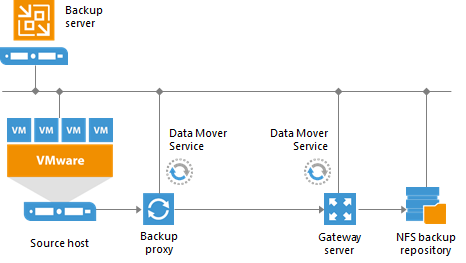
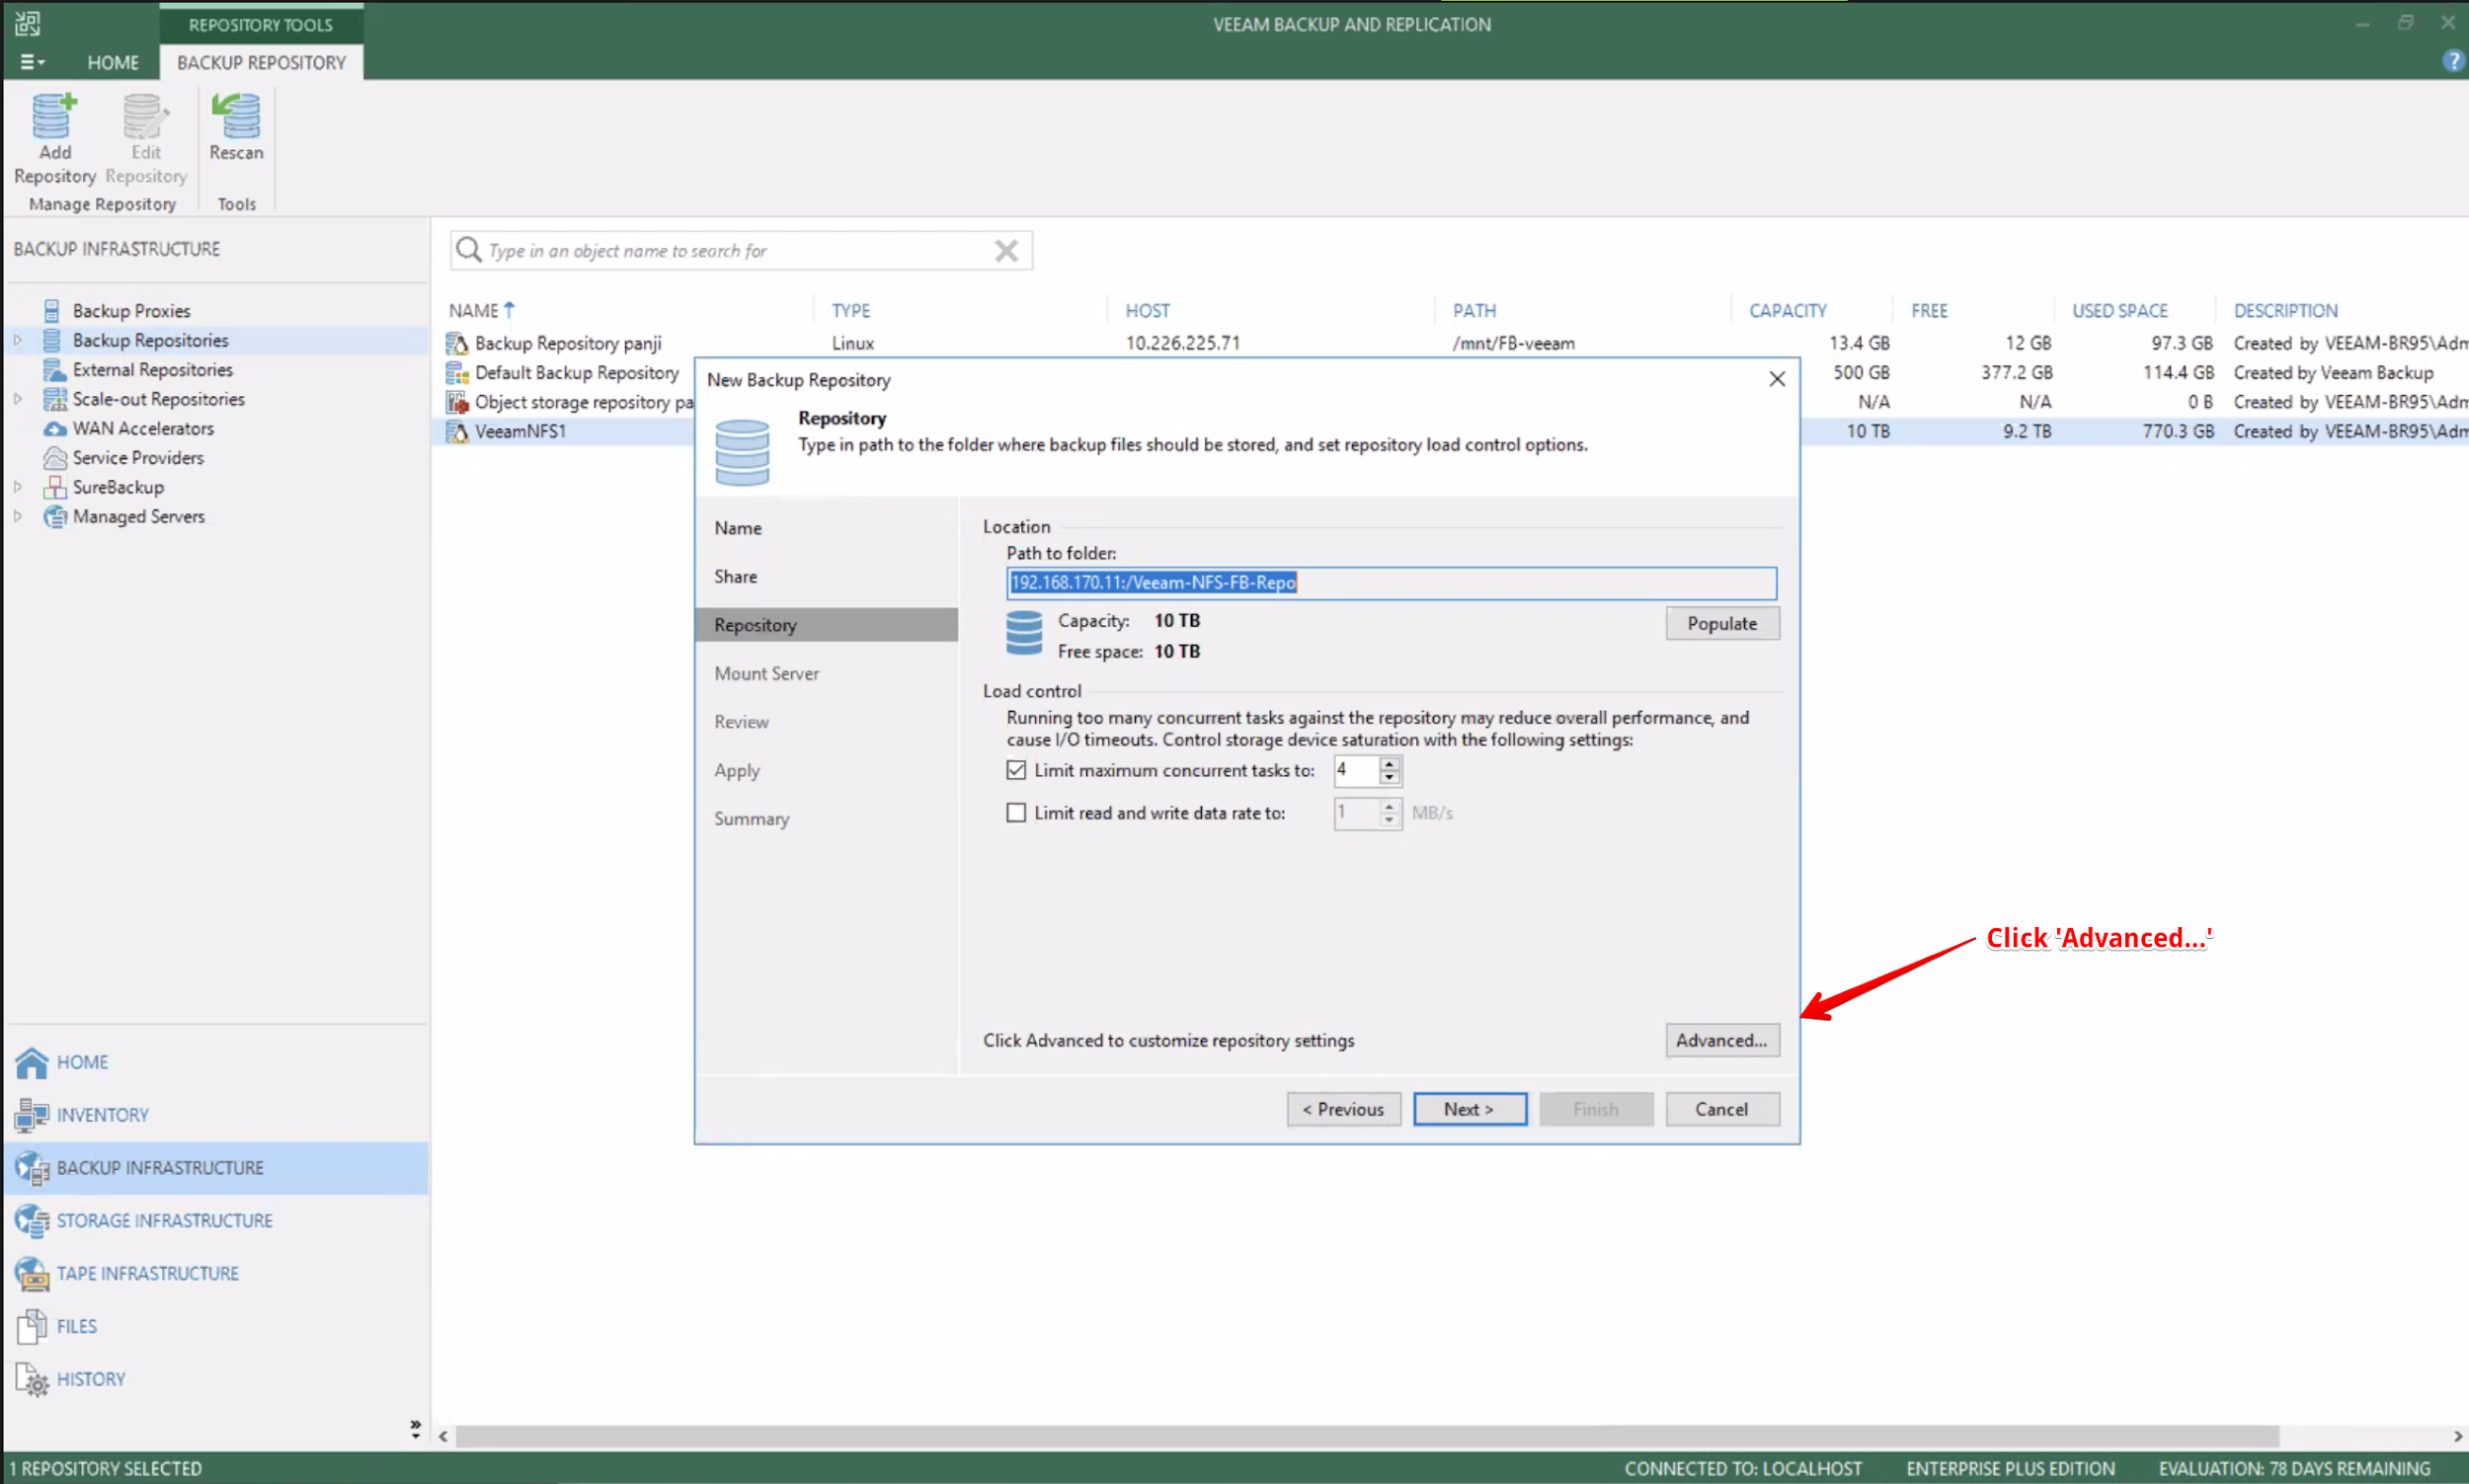
At the next step, we are required to enter the path to the NFS shared folder. To communicate with the NFS share, Veeam needs to deploy a Veeam NFS gateway server. This is because an NFS share cannot host Veeam Data Movers itself. The Veeam Backup server will automatically deploy a Veeam Data Mover onto the machine we specify as the gateway server.
We can use the Veeam Backup & Replication server (itself) or we can specify another machine for this task. The role of the NFS gateway server can be assigned to either a Microsoft Windows or Linux OS machine (physical or virtual). For more information, see Requirements for NFS Gateway Server. Note: An NFS Gateway server has different requirements from a Veeam Gateway Server.
If the network connection between the source datastore and backup repository is fast, it is generally recommended to choose ‘Automatic selection’ for the gateway server. If you’re performing backup and replication over Wide Area Network (WAN) or slow connections, it’s recommended to select a server that is on the target site using the ‘The following server’ setting.
If you decide to add more NFS shares, it’s worth considering configuring additional NFS gateway servers for the new NFS shares to ensure a single gateway server does not become a bottleneck.
The ability to deploy an NFS gateway role to a machine is one of the key advantages in Veeam Backup & Replication v10, as earlier versions of Veeam did not have this NFS gateway role, organisations were required to manually mount NFS shares on Linux servers and configure the repository using the ‘Linux repository’ type. If you’re interested in the process required for Veeam Backup & Replication v9.5, check out Dan Frith’s awesome article here.
Regarding ‘Load Control’ settings, check out these three links for sizing advice:
Veeam recommends against disabling the load control setting, as it may lead to overload and even job failures.
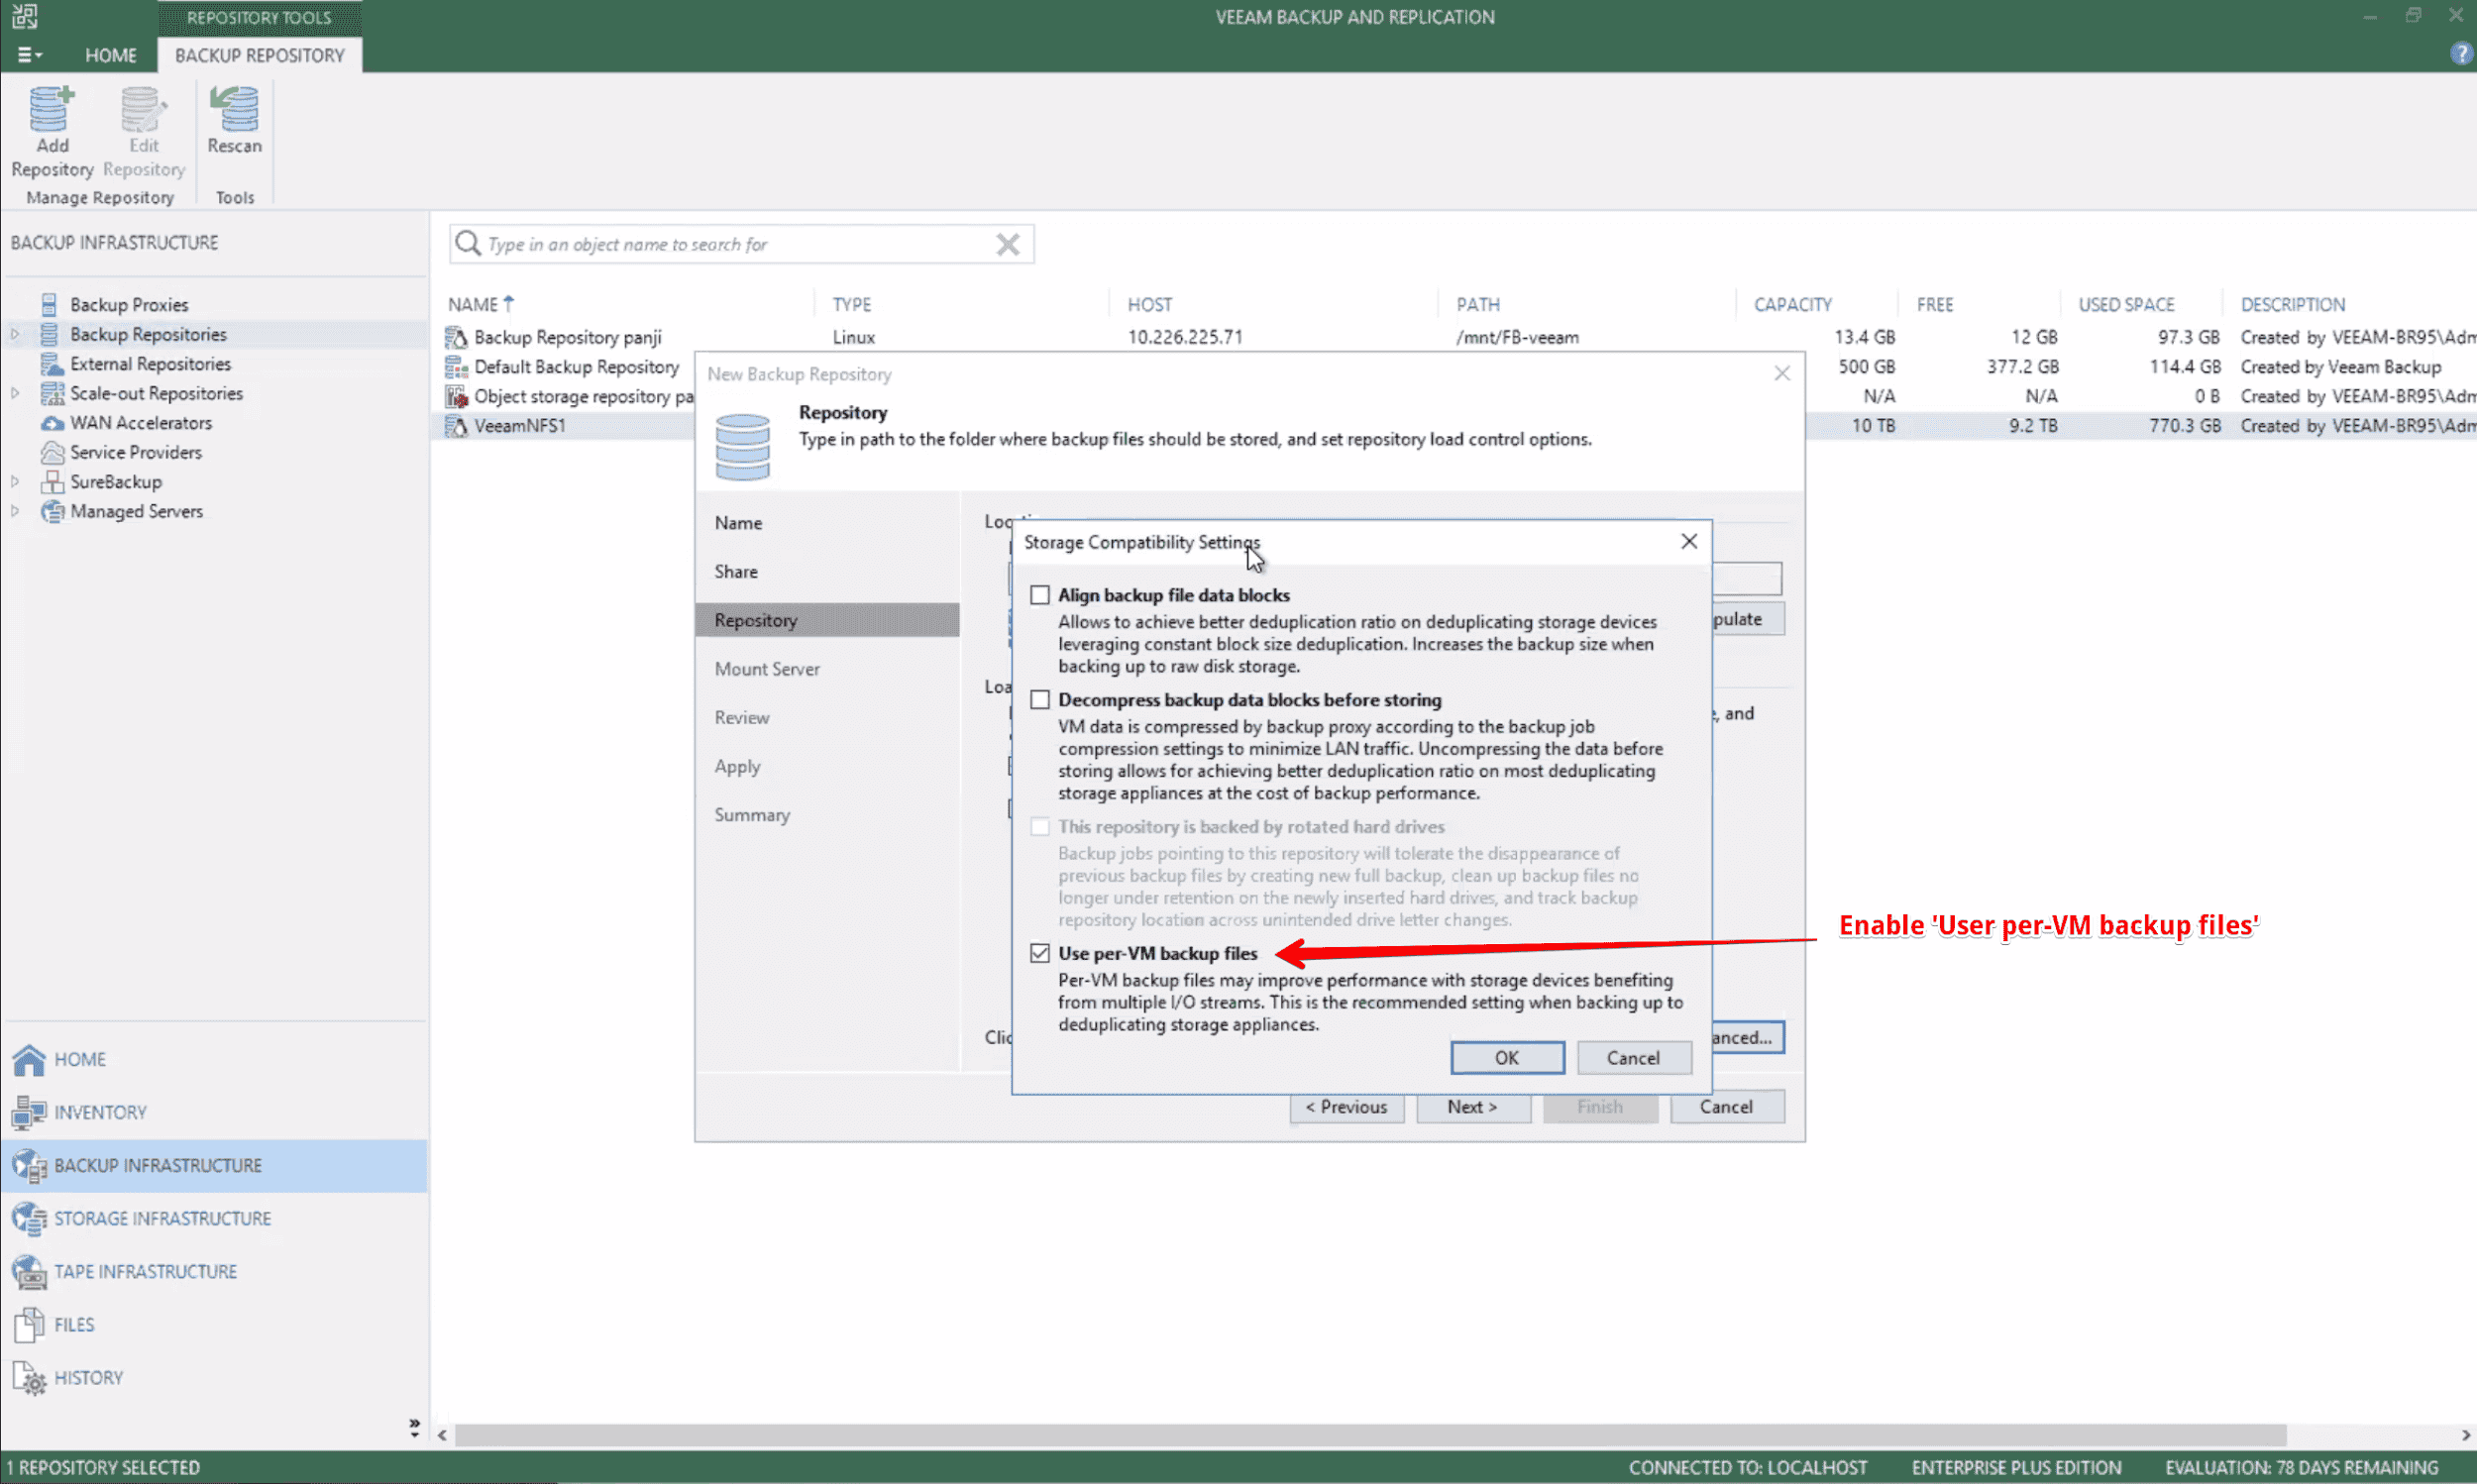
Click ‘Advanced…’.
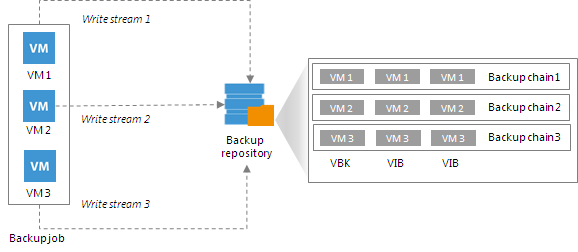
By default, backup jobs write VM data to the backup repository in one write stream, and store data of all VMs to the same backup file. Such behaviour is non-optimal for the FlashBlade because the FlashBlade is capable of writing data in multiple streams simultaneously. If we left this setting disabled, the FlashBlade repository may become the bottleneck for the data transfer, even though its resources will not be fully utilised.
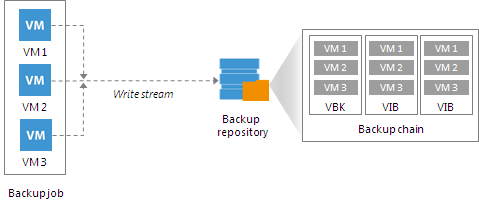
To ensure the best performance, as we know the storage device such as the FlashBlade can handle multiple write streams, we’ll enable ‘use per-vm backup files’ on the backup repository.
In this case, the Veeam backup job will use a separate write stream for every VM in the job, and store data of every VM to a separate backup file. Resources on the FlashBlade storage device will be used more efficiently, and the job performance should increase.
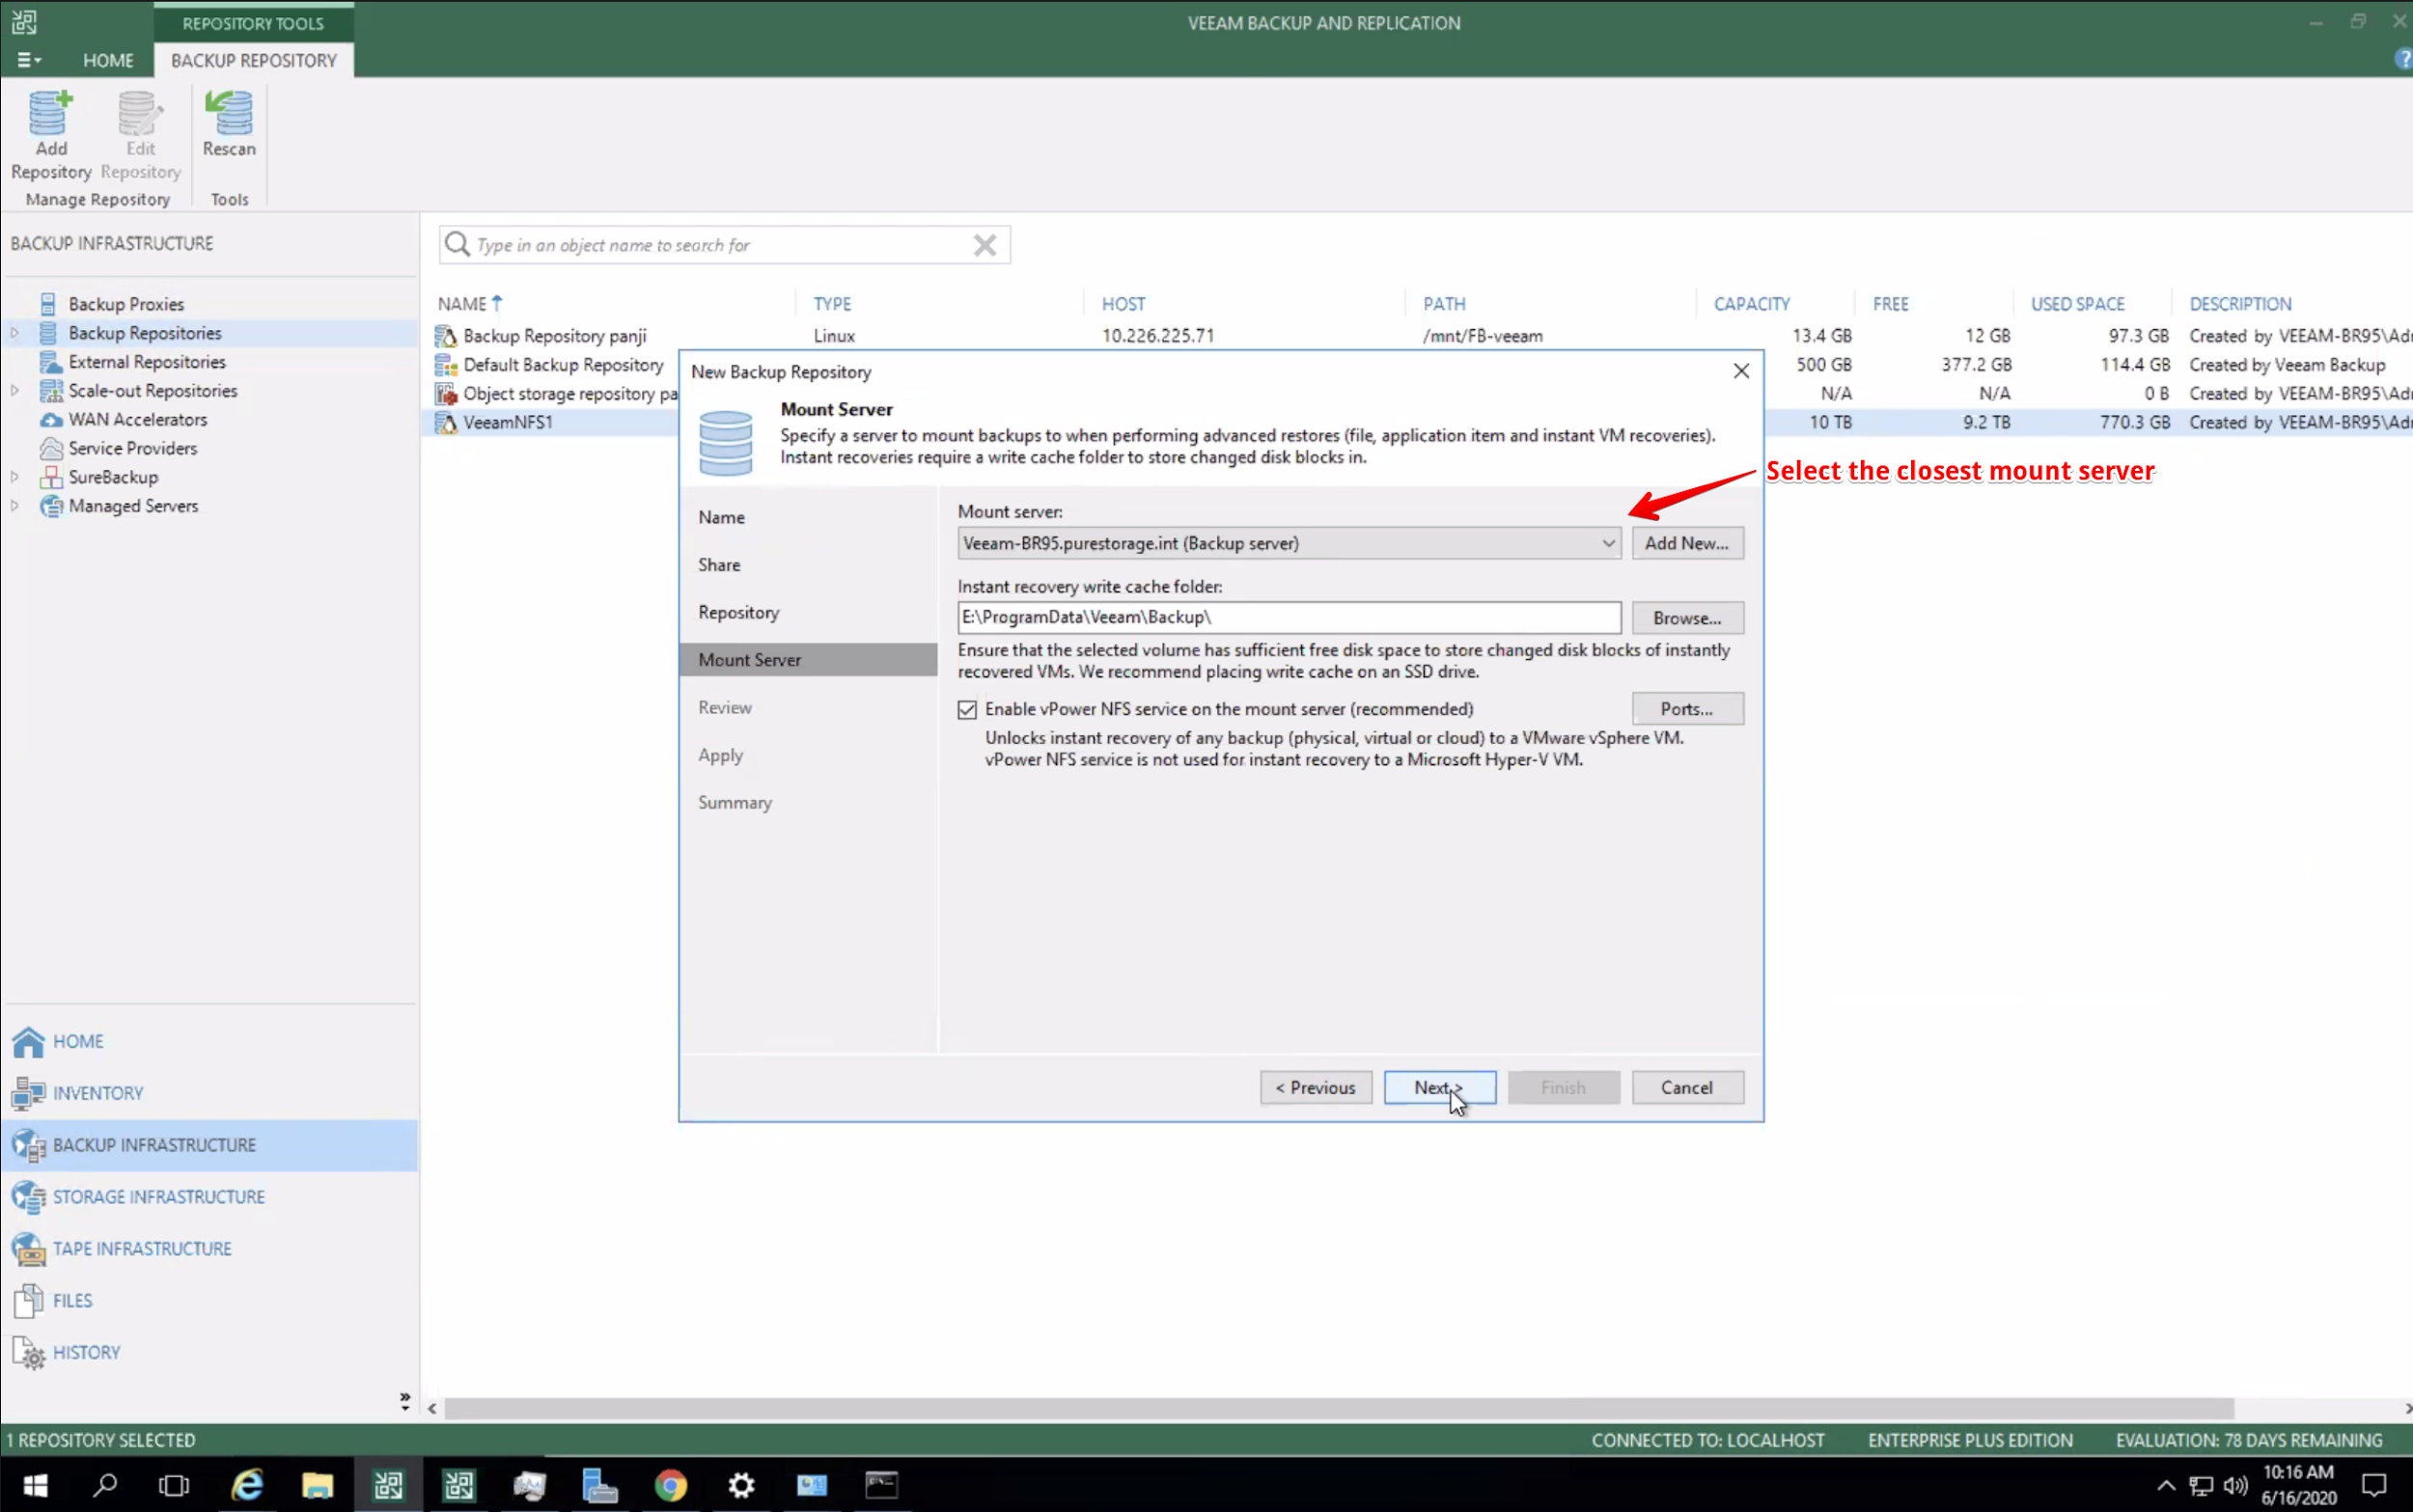
At the next screen we are prompted to specify which machine to use as the ‘Mount Server’.
During the restore process, Veeam Backup & Replication will mount the VM disks from the backup file residing on the backup repository to the mount server. It is always recommended to select a mount server that is as close to the NFS share as possible. By selecting a machine nearby, VM data will not have to travel over slow networks such as WAN links. For more information, see Mount Server.
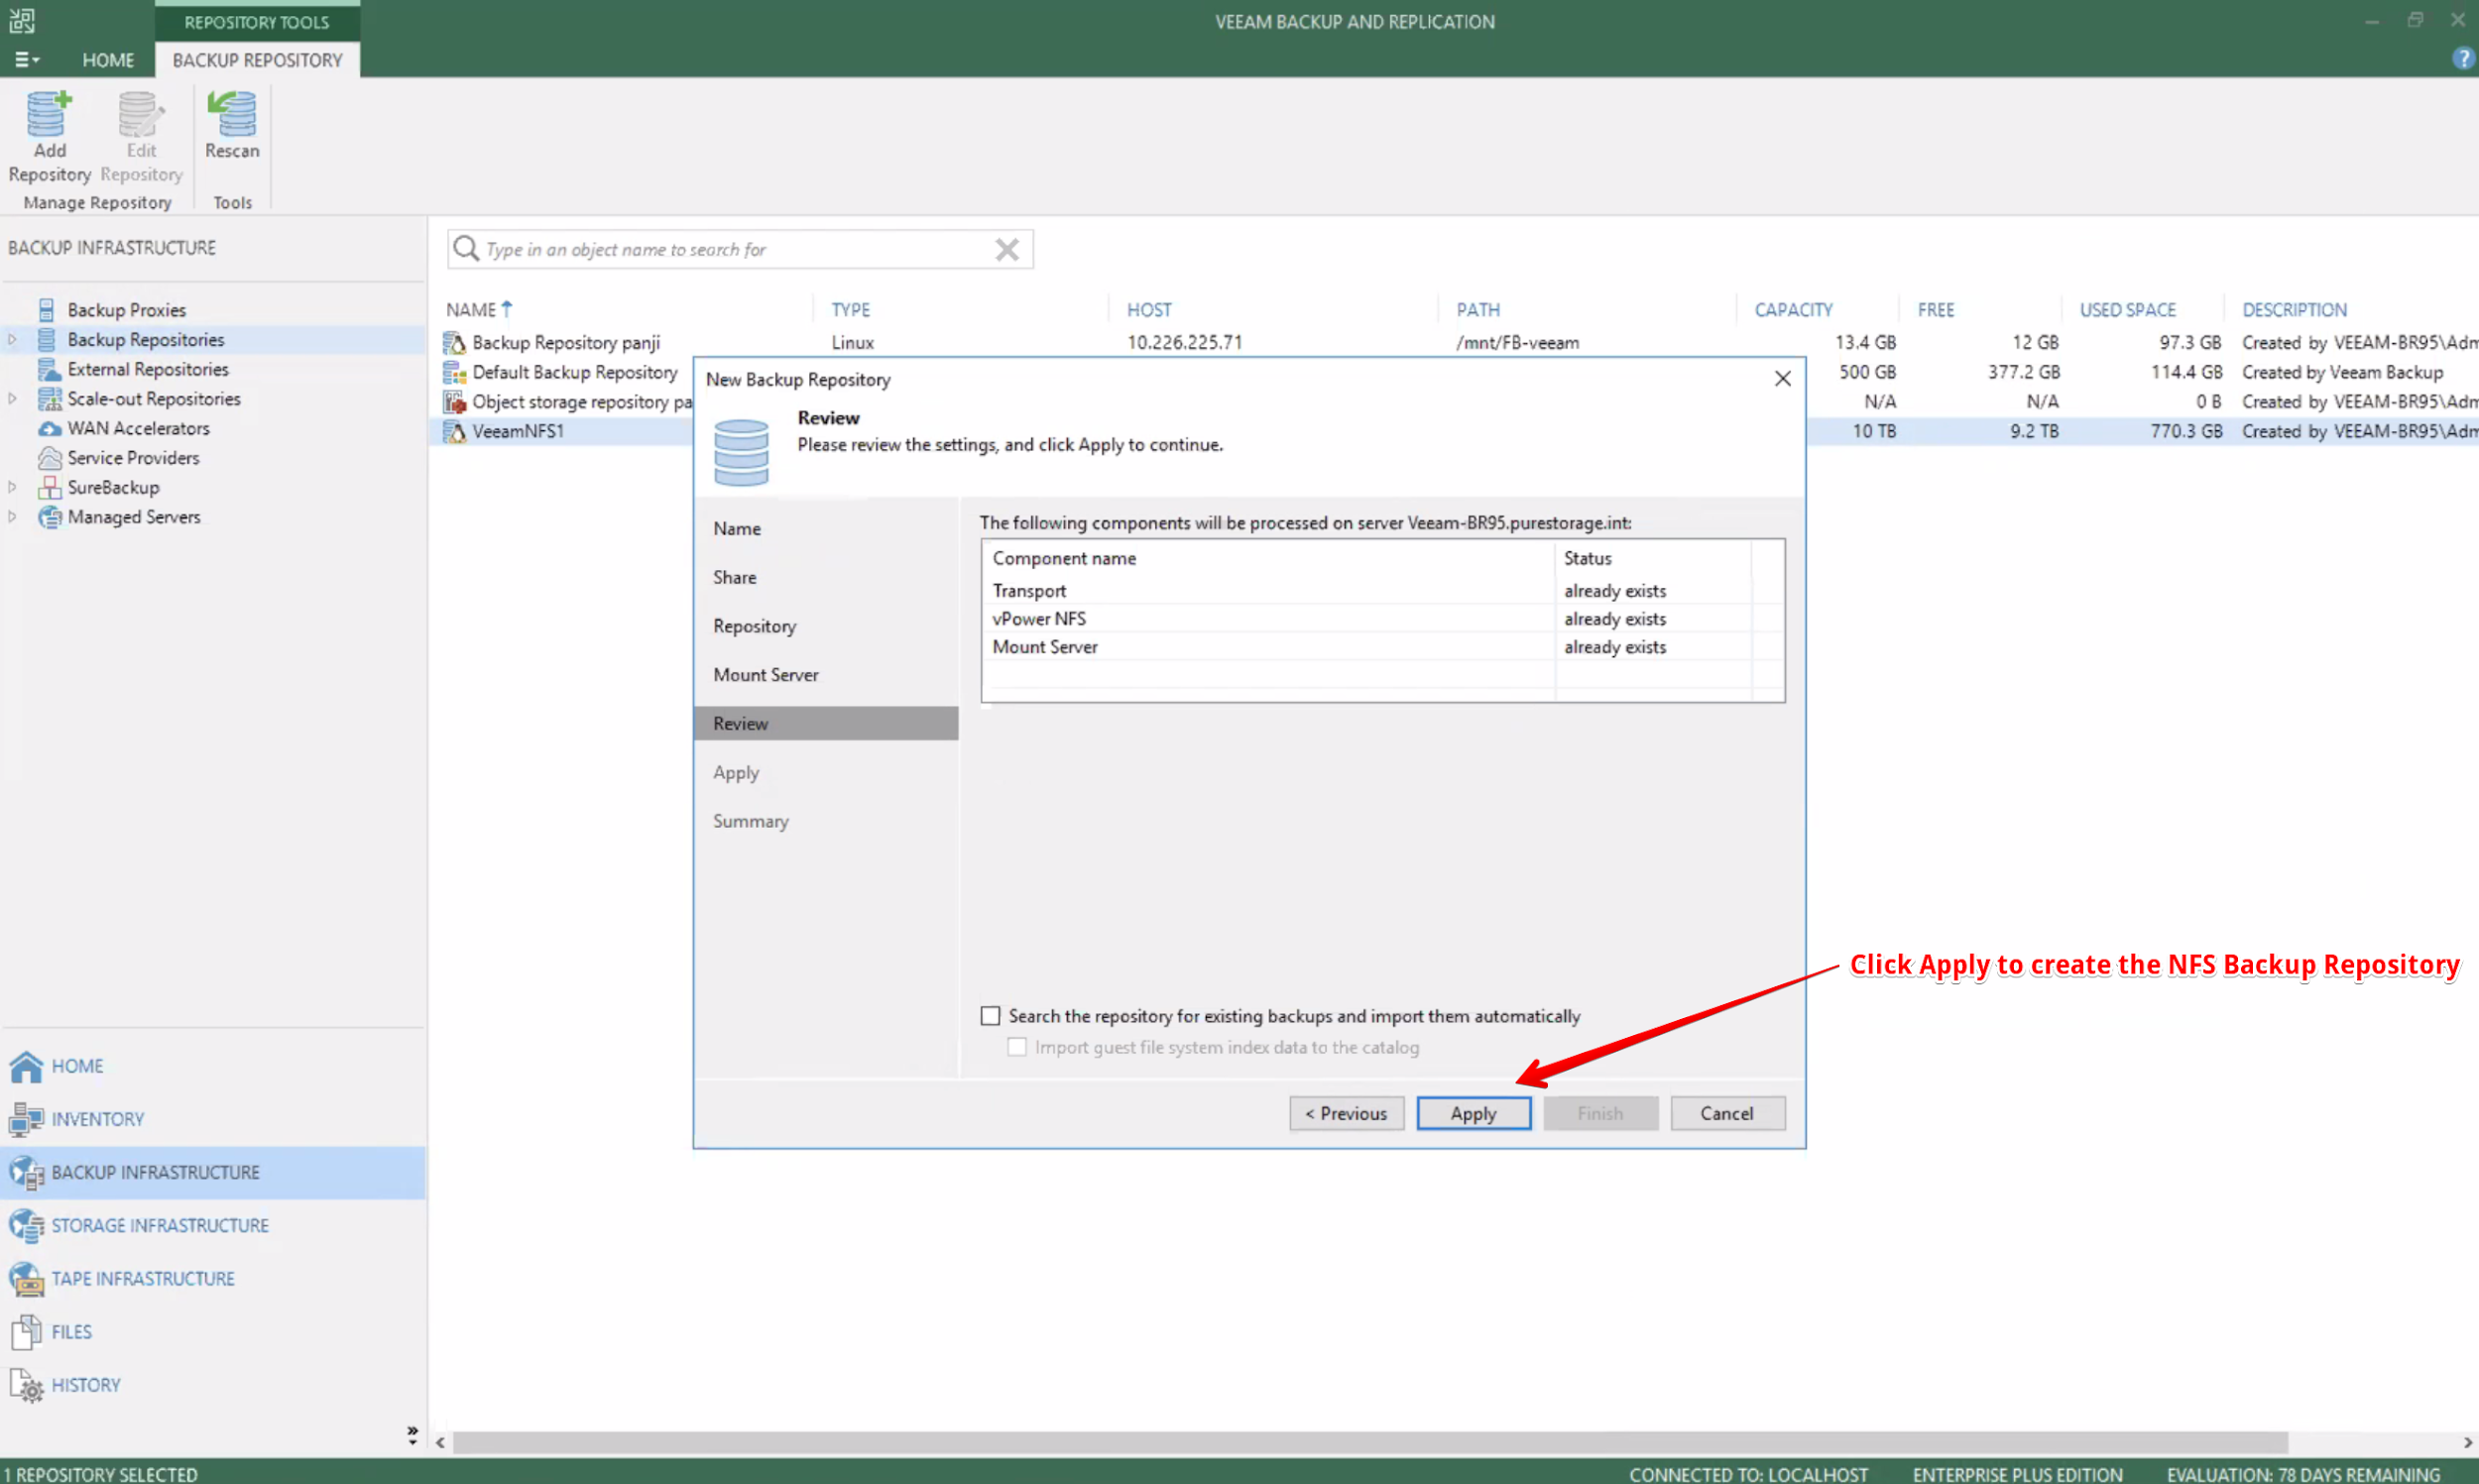
At this stage, we can review the backup repository settings and click Apply to create the NFS backup repository.
Move to the apply section which details each step being performed.
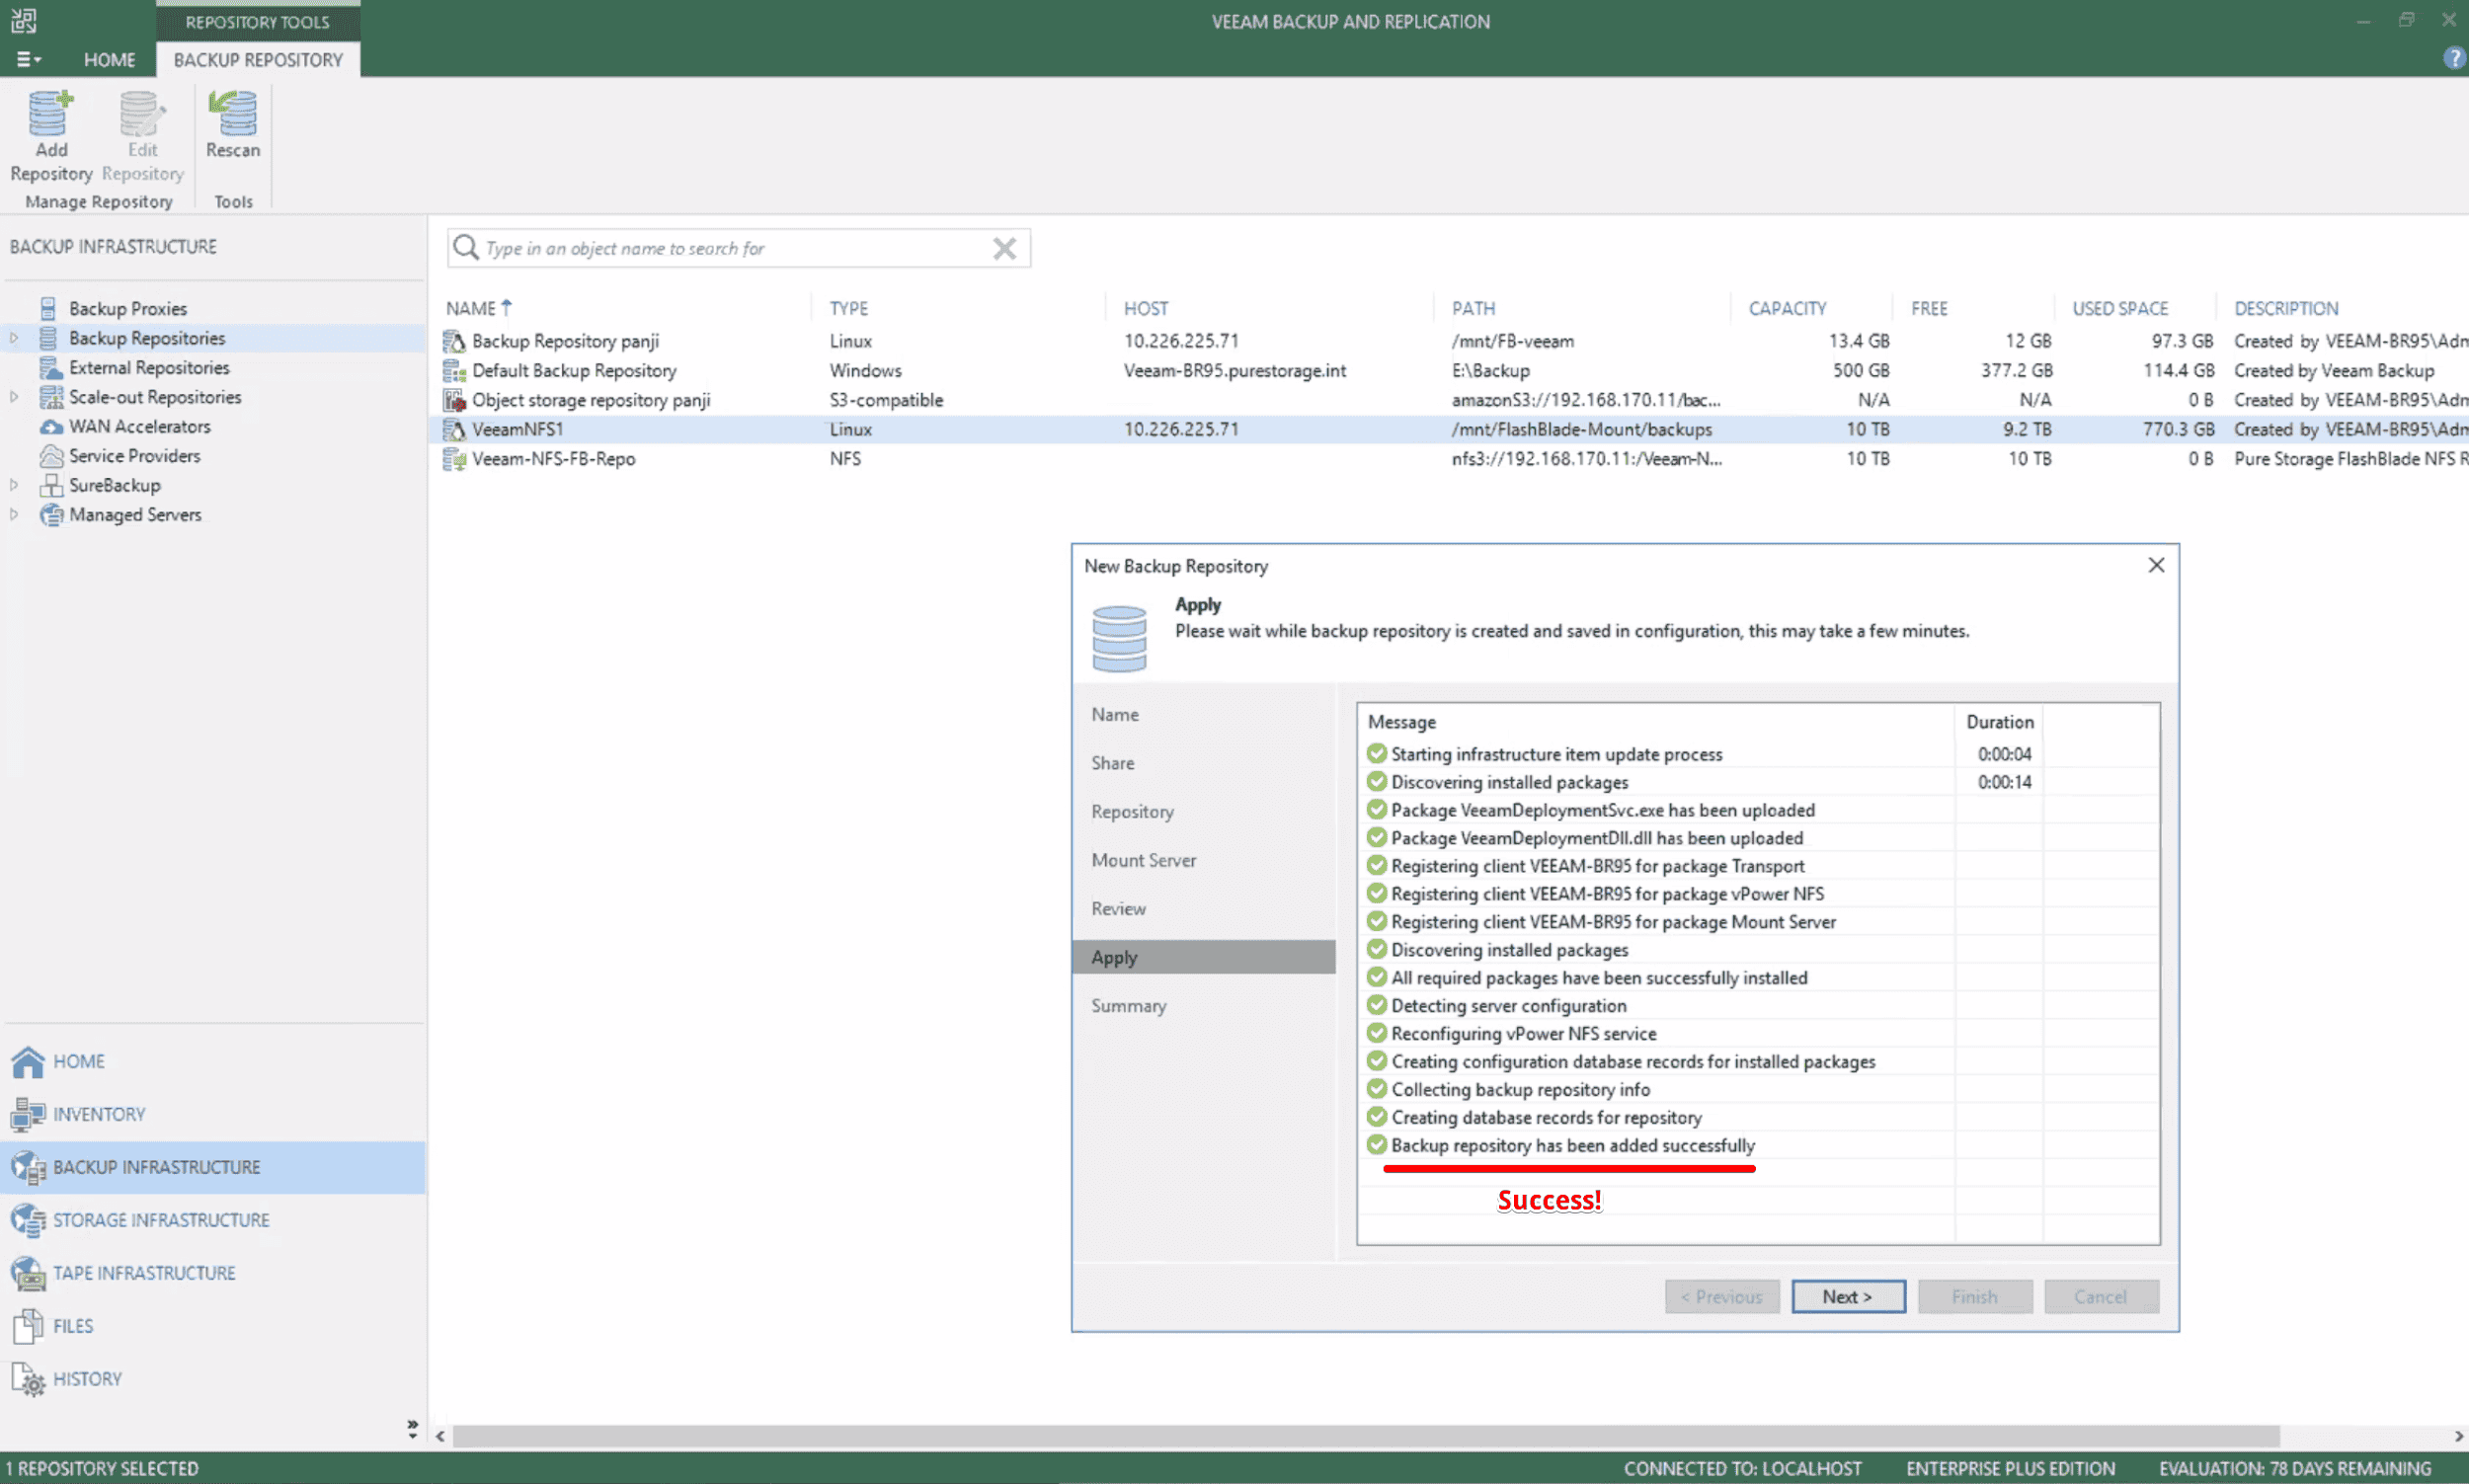
Success indicates that the NFS share has been added into Veeam as a backup repository.

Success indicates that the NFS share has been added into Veeam as a backup repository.
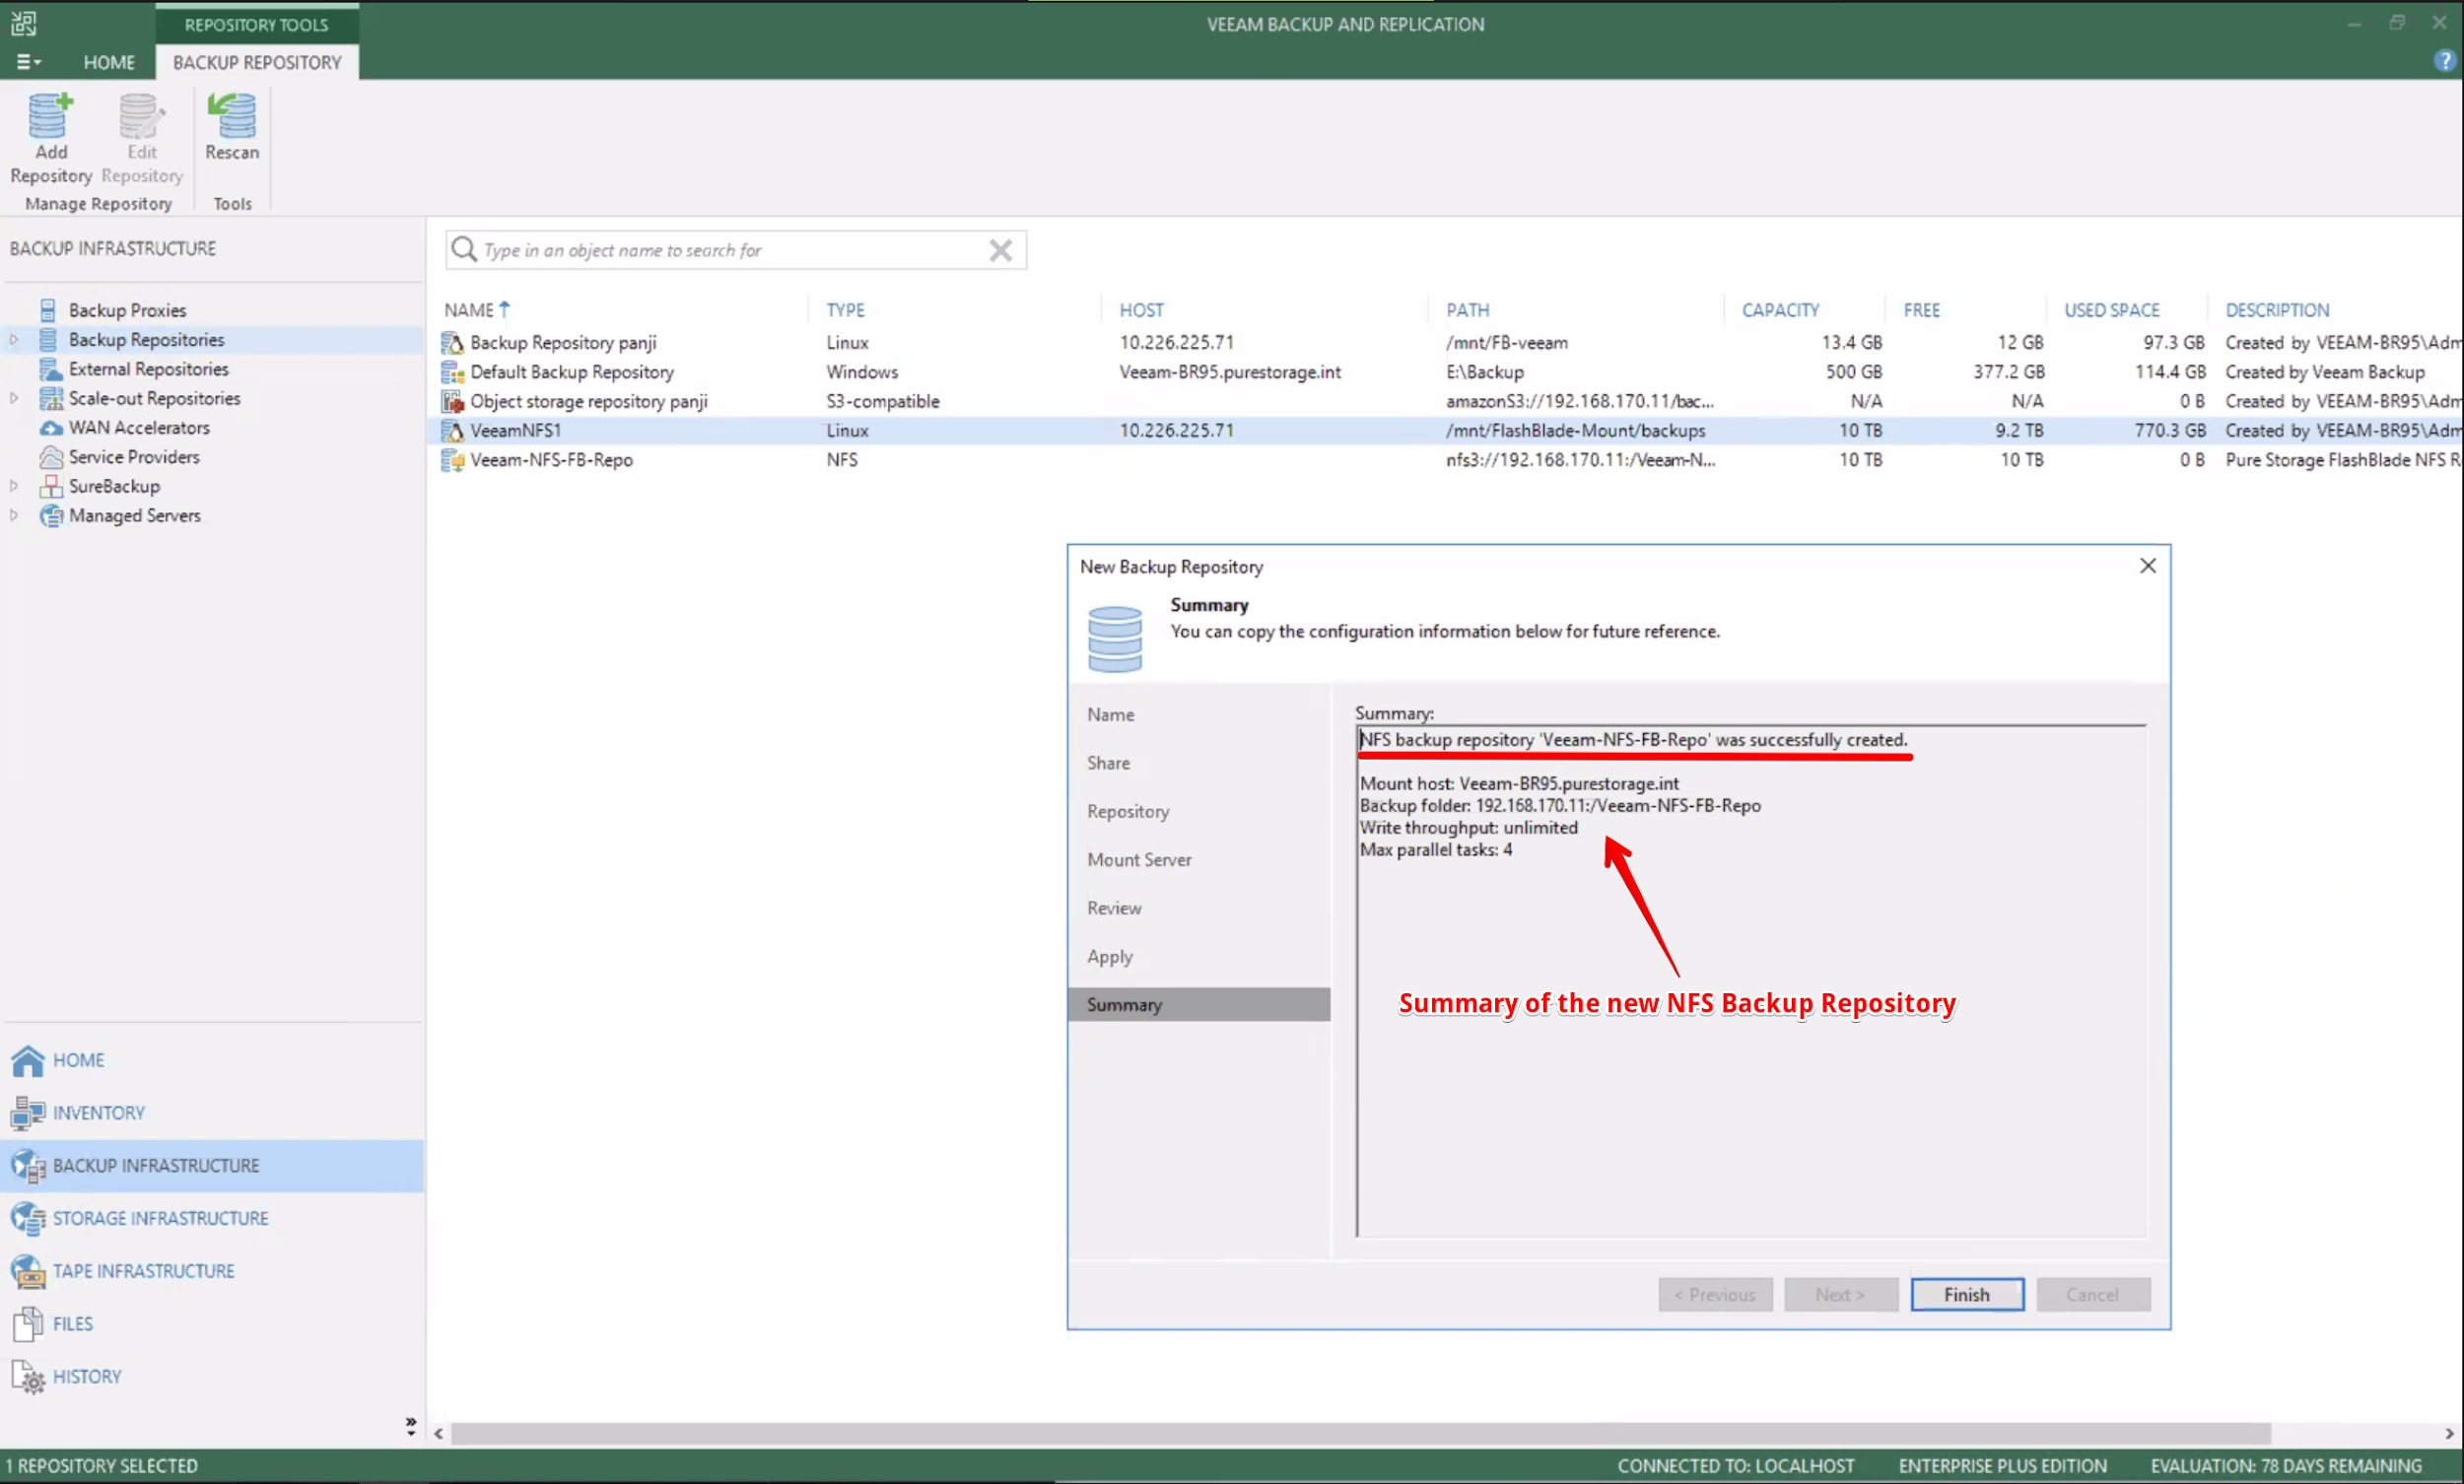
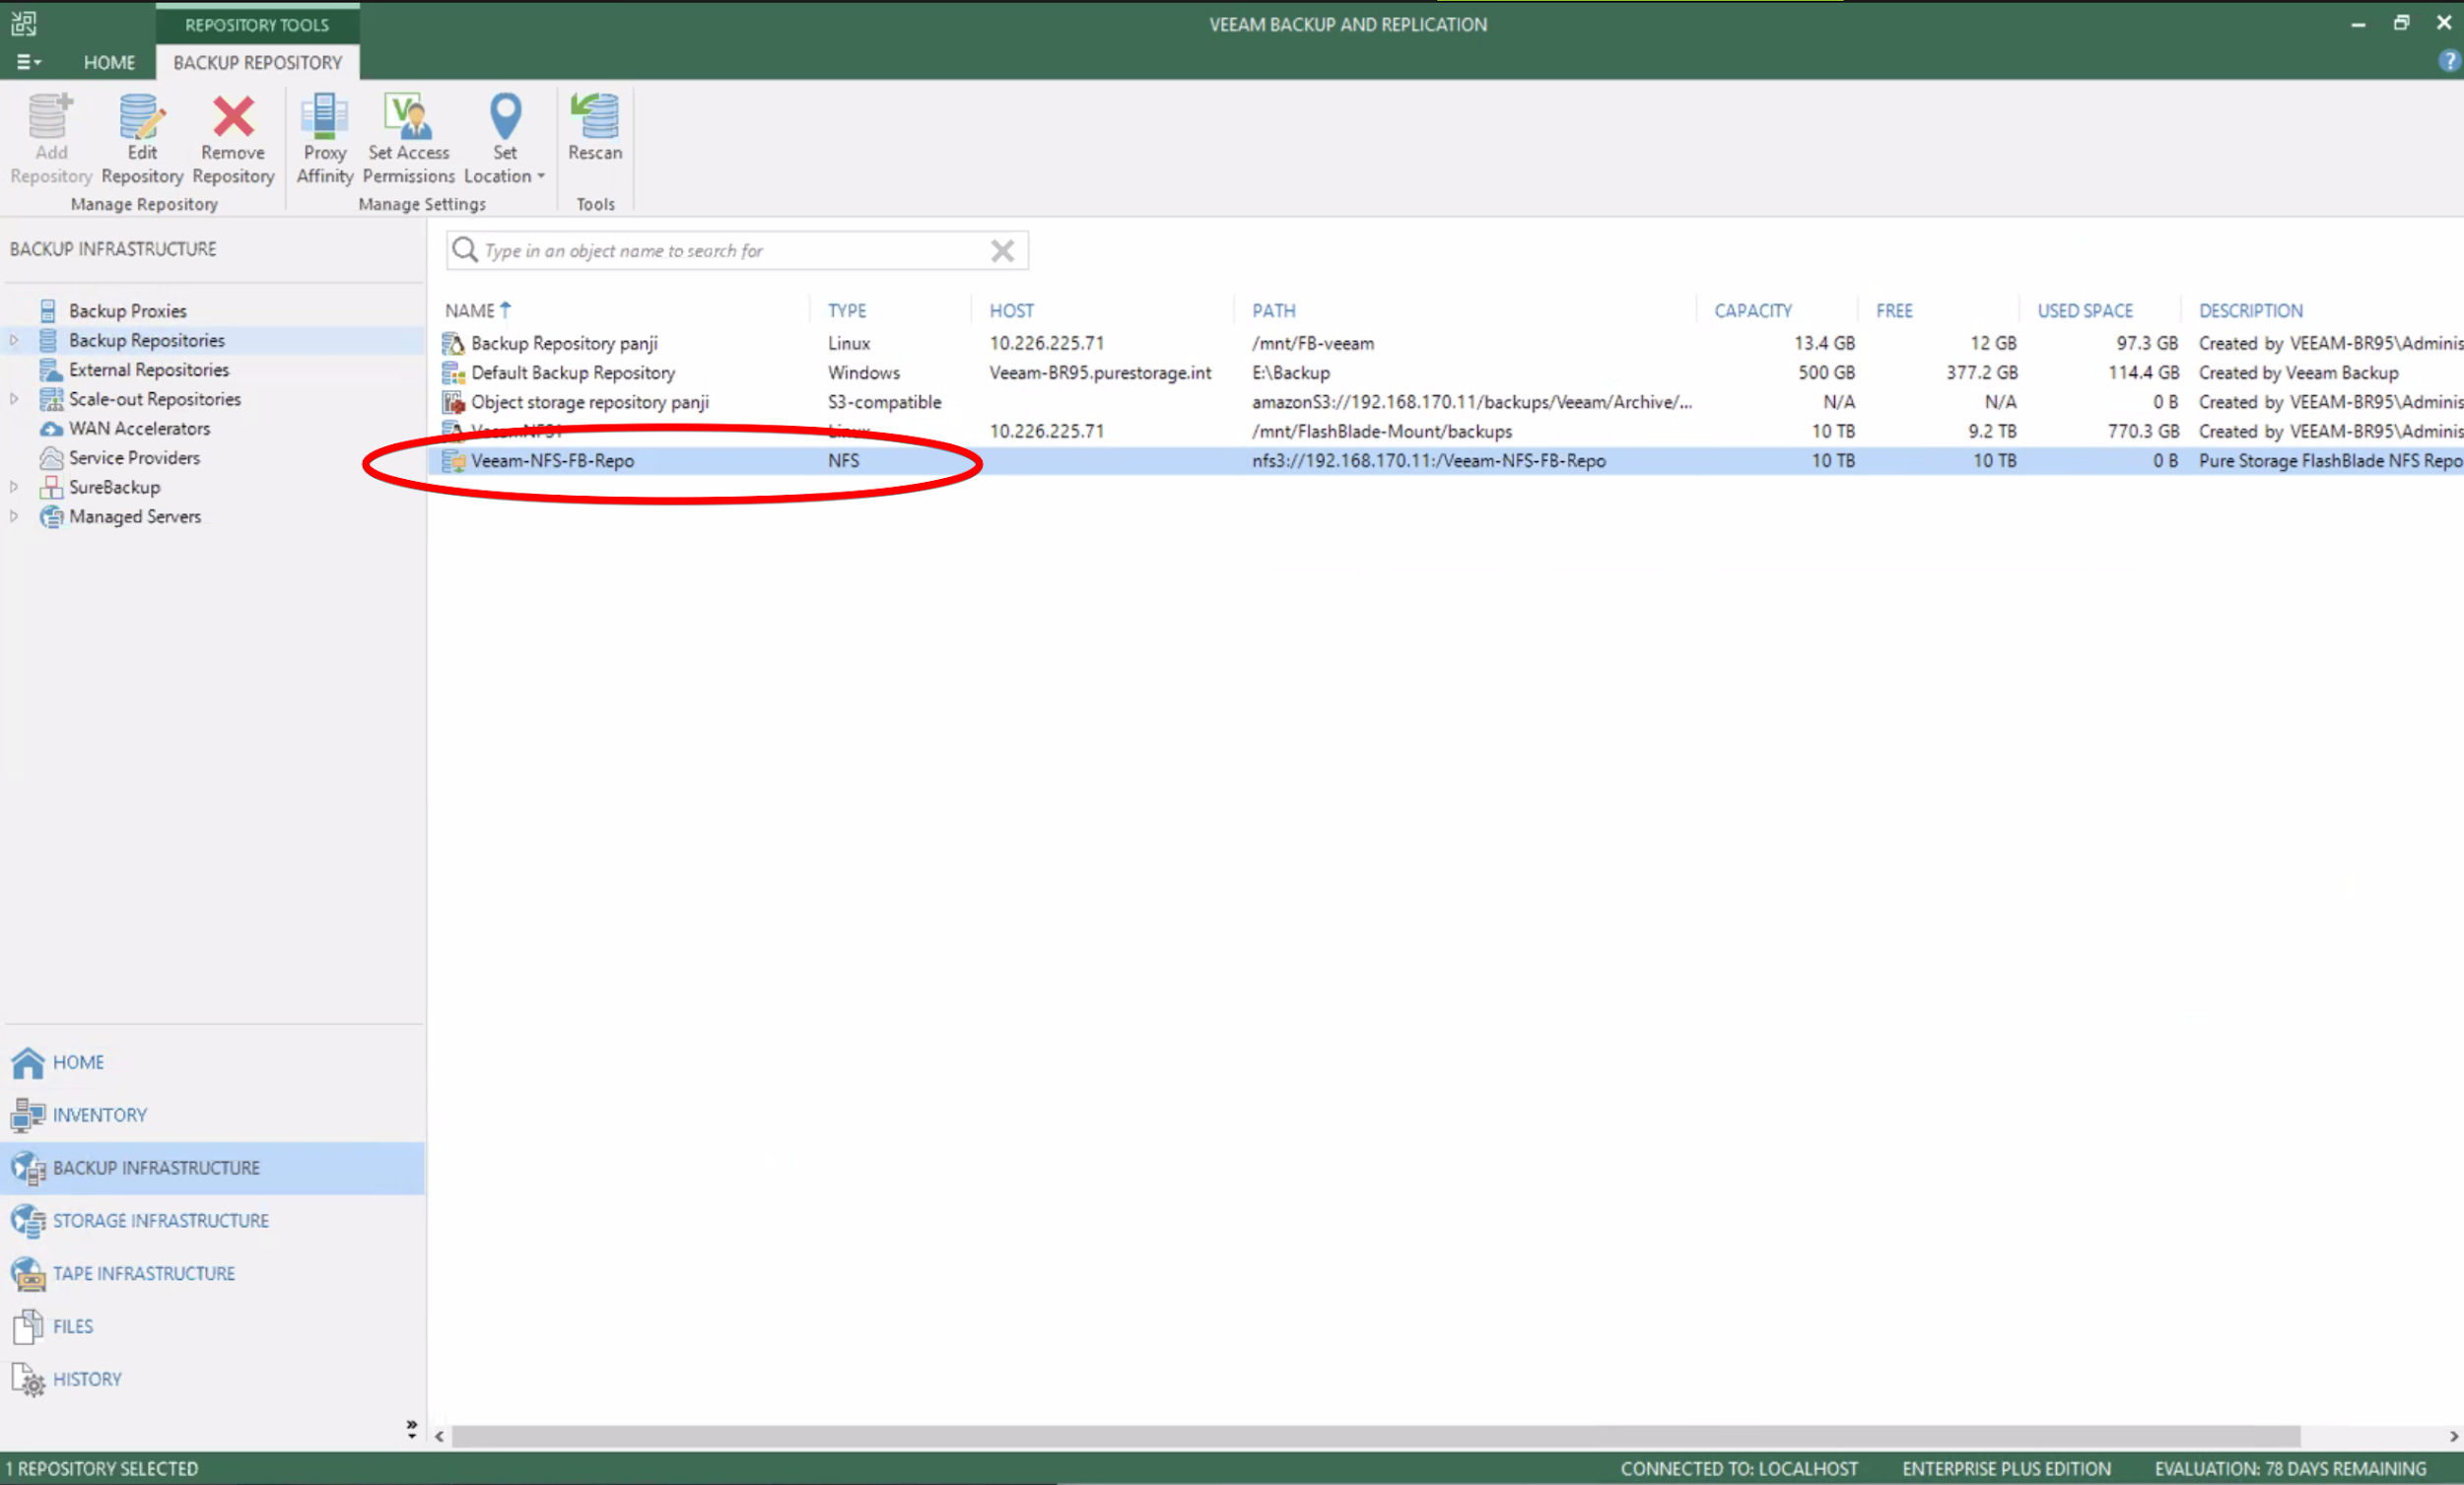
Our new NFS share backup repository is now ready to use.
As always, the selection of the backup repository is configured per job,so we can create a new job or edit an existing job and select our new NFS backup repository.
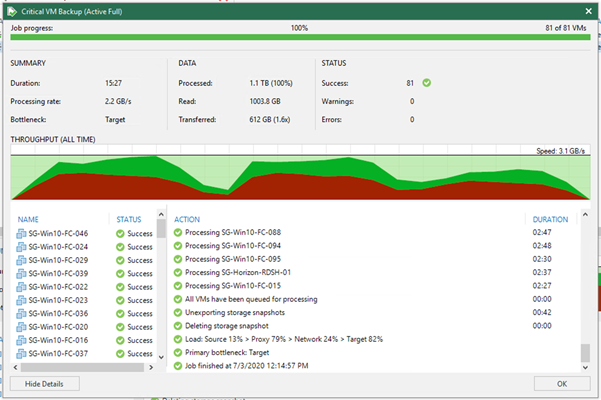
Running the backup job is shown below.
One way to further improve throughput and resiliency for the NFS protocol is to implement an NFS Scale-Out repository within Veeam. This will aggregate multiple data VIPs and/or NFS File Systems from FlashBlade into a single logical repository that is capable of accepting network traffic from a wider range of NFS mount points.
A scale-out NFS repository that is spread across multiple FlashBlade virtual IP addresses and Veeam gateway servers can offer increased throughput and resiliency as the scale-out implementation increases the number of data paths between Veeam and FlashBlade.
Obviously, there are some overheads to consider when deploying Veeam NFS gateway servers, as so many customers will simply leverage their existing Veeam proxies.
Implementation of a scale-out repository is very straightforward. At least two or more NFS repositories for FlashBlade must be created using the steps previously outlined, and then the multiple NFS extents are added to a single scale-out repository.
In this blog, we’ve shown you how to configure an NFS share within a FlashBlade and how to easily add this NFS share as a backup repository within Veeam. For any Veeam customers who avoided NFS repositories in the past due to the required complexities when setting one up can rest assured that the process has been greatly simplified in v10.
Veeam customers who previously settled for SMB should consider switching to NFS as it offers several advantages over SMB such as better performance in most instances and trusted-host authentication compared to SMB’s user-password authentication method.
If you are facing challenges like this or would like to learn more about Veeam follow me on LinkedIn or contact the Data#3 team of Veeam Specialists.
The number of blades in the FlashBlade will impact the performance. In our example, we had 15 blades. 1 Blade will provide 1GB/s of read performance.
In our lab, we’re backing up from a FlashArray M20 (r2) over iSCSI using DirectSAN. We’ve followed Pure Storage best practices for configuring jumbo frames for the iSCSI and MPIO that can be found here.
All proxy servers accessing source FlashArray via 2 controllers.
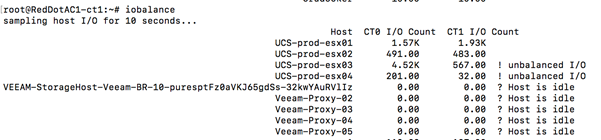
FlashBlade (Target NFS Repository) Performance